AnyPortrait > Manual > Exporting to another project
Exporting to another project
1.0.0
Often times, a situation occurs to copy your work in Unity to another project.
There may be many reasons, such as wanting to test out an updated version of Unity, or sharing resources with other projects.
However, if you copy Unity's asset files as it is, the data connection will be broken, and they may not work properly.
Also, like AnyPortrait, it is difficult to copy assets where data is stored in the Unity scene because there is no separate file.
This page introduces two ways to copy AnyPortrait's characters to another project.
This method can be used not only for AnyPortrait, but also for most Unity assets and plugins.
Also, if you'd like to send your work to our team to solve any bugs or difficulties, the methods on this page will be useful.
It is possible to export to another project using AnyPortrait's Backup function (Related page).
However, since the backup function is for the purpose of recovery, properties related to external components are not stored.
Therefore, if possible, please use the methods introduced on this page.
Export the Scene
Characters created with AnyPortrait are stored in Unity's scene.
By default, characters do not stored as files, so it is common to copy a scene file (.scene).
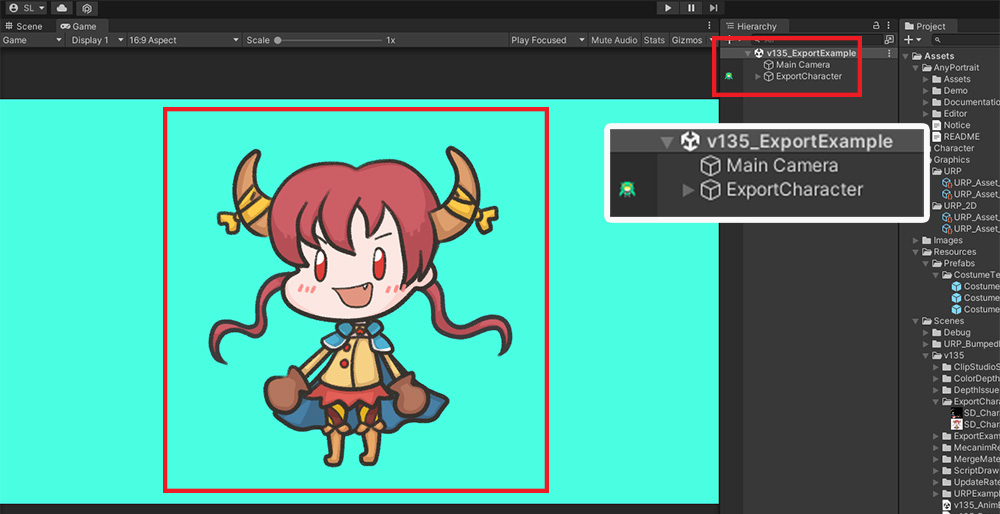
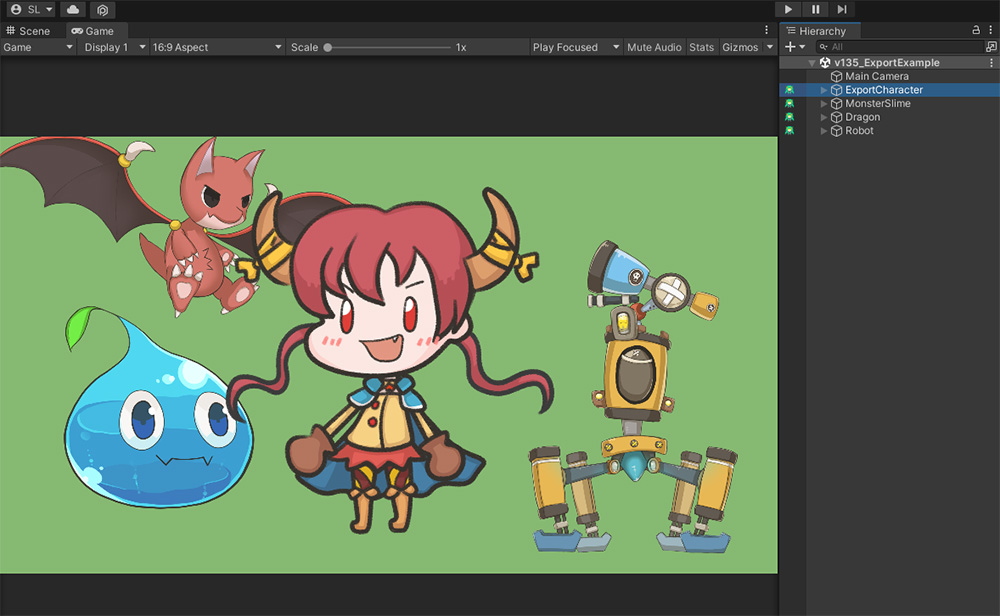
The prepared scene is composed as above.
The character we want to export has some animations.
Let's copy this character to another project.
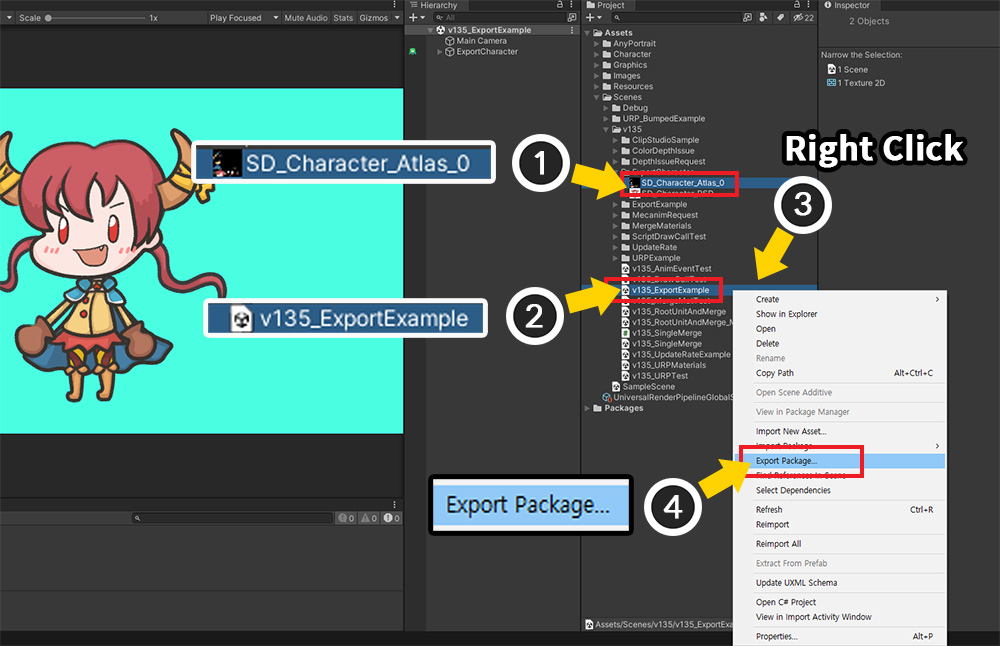
(1) Select the Texture Asset being used in the character.
(2) Select the Unity Scene to export while holding down the Ctrl key.
(3) With all targets selected, right-click on the Project UI.
(4) Click the Export Package menu.
Note
If your character works with other assets such as Mecanim and animation clips, select those assets as well.
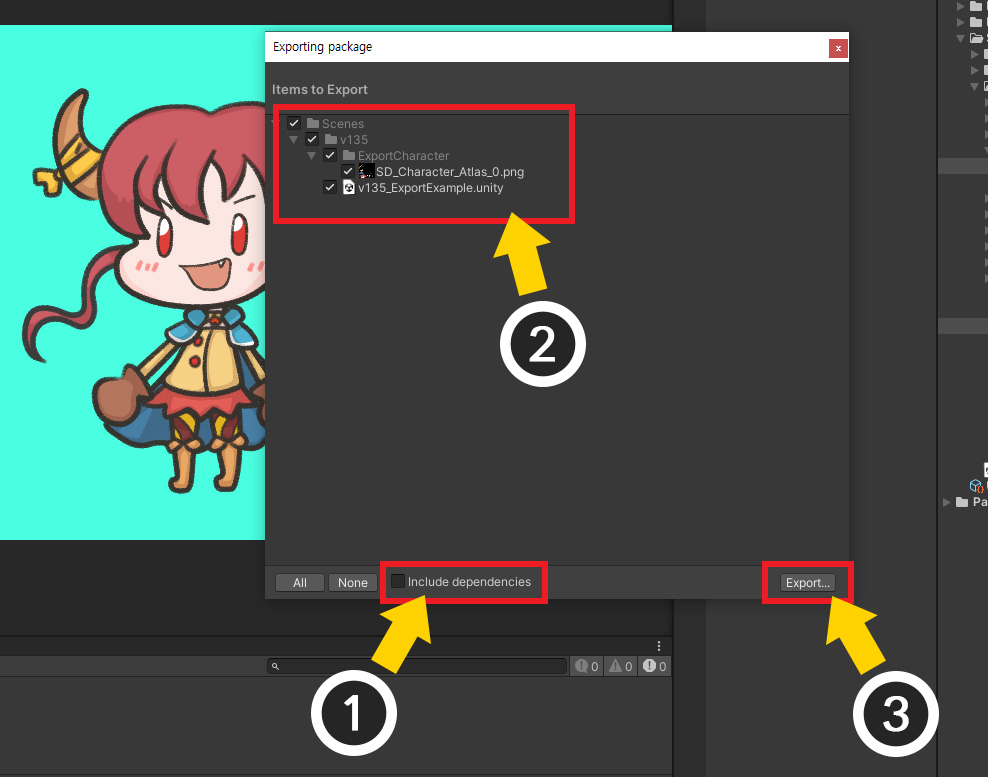
The Exporting package dialog appears.
(1) Disable the Include dependencies option. (If this option is turned on, all scripts related to the selected objects will be saved.)
(2) The selected objects are displayed in the list.
(3) Save the "Unity Package File (.unitypackage)" in an appropriate location by clicking the Export button.
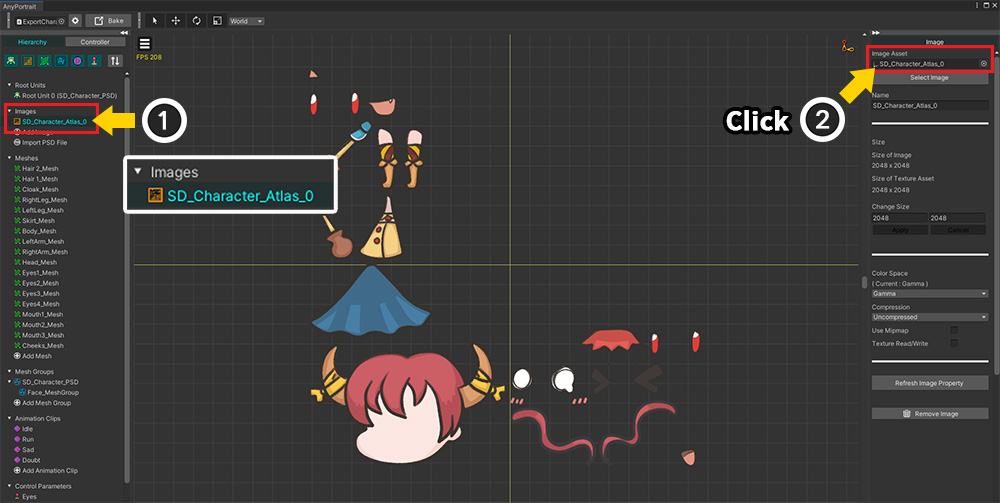
If it is difficult to find the character's Texture Assets,
(1) Select an image in AnyPortrait editor.
(2) Click the texture asset property being used in the image.
The texture asset will be highlighted in the Unity editor to make it easier to find.
Import the Scene file
Let's import the saved scene file including the character into a new project.
(New projects must have the same version of AnyPortrait installed.)
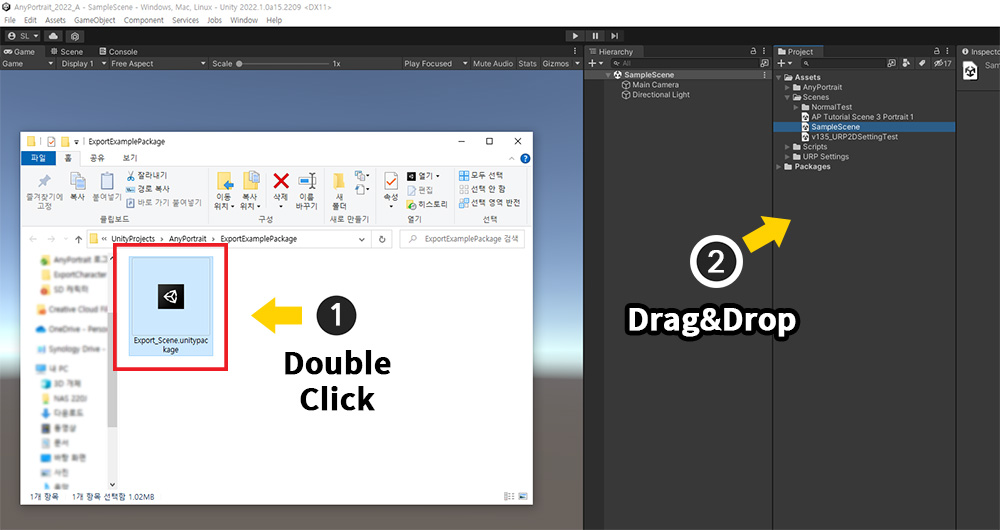
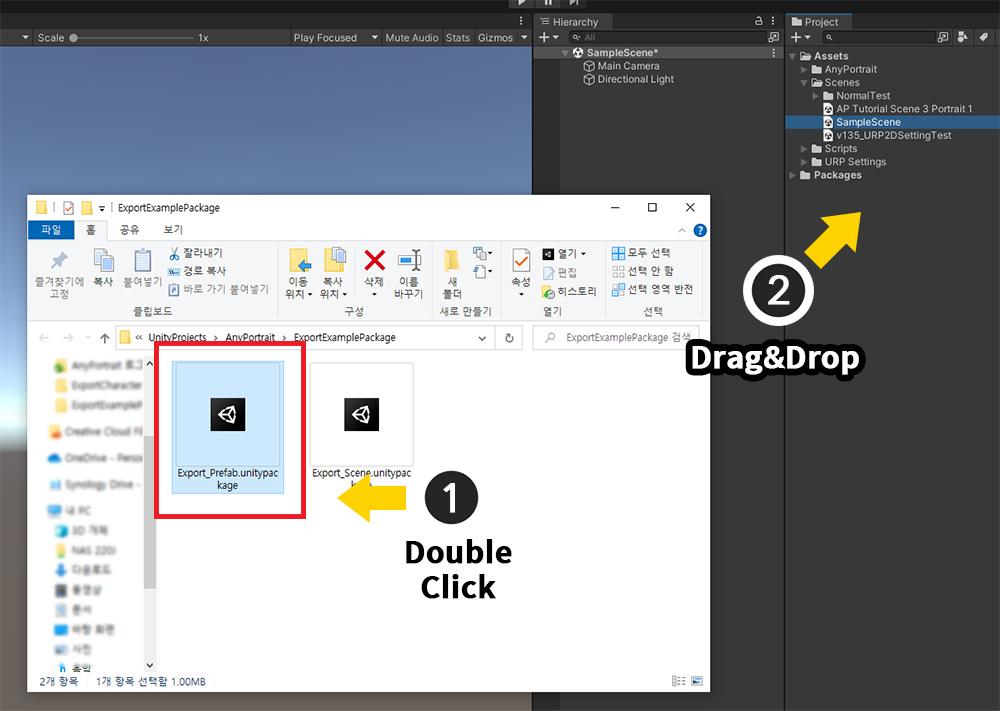
(1) Double-click the saved Unity package file or (2) Drag it into the project.
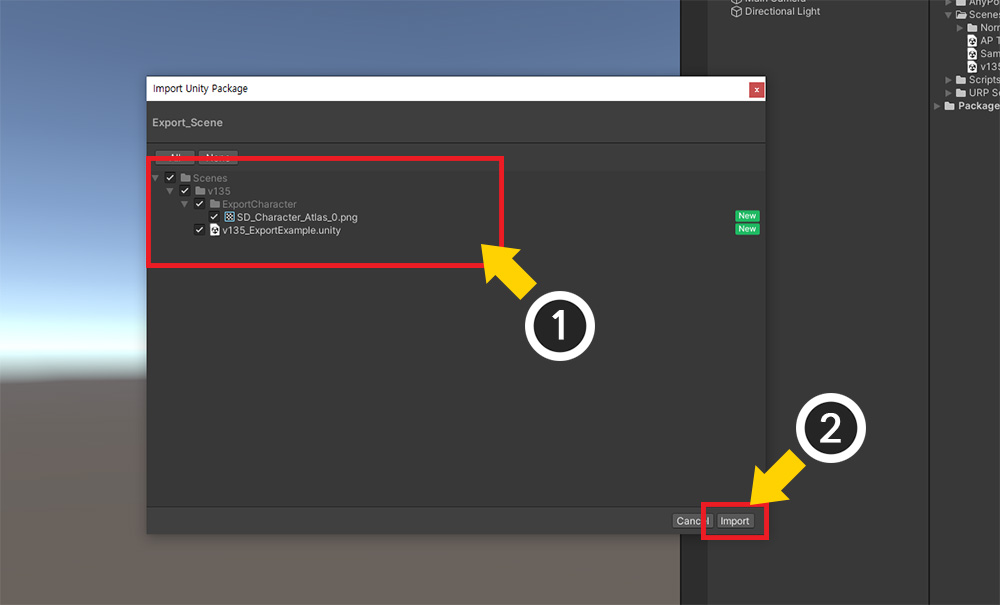
A dialog opens for importing the package file.
(1) The scene and image are stored in the package. Select all.
(2) Press the Import button.

(1) The scene and image are imported to the current project.
(2) When you select the imported scene, you can see that the character has been copied normally.
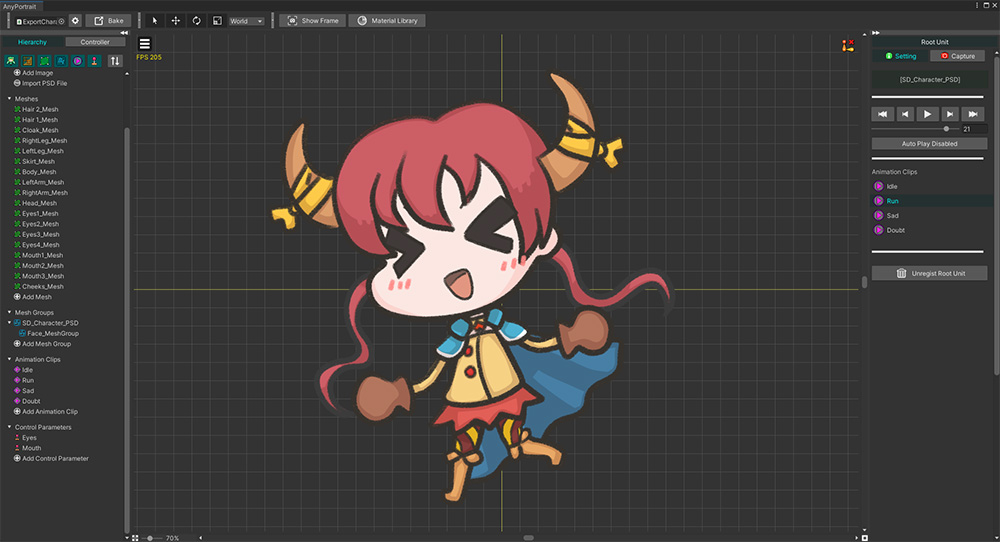
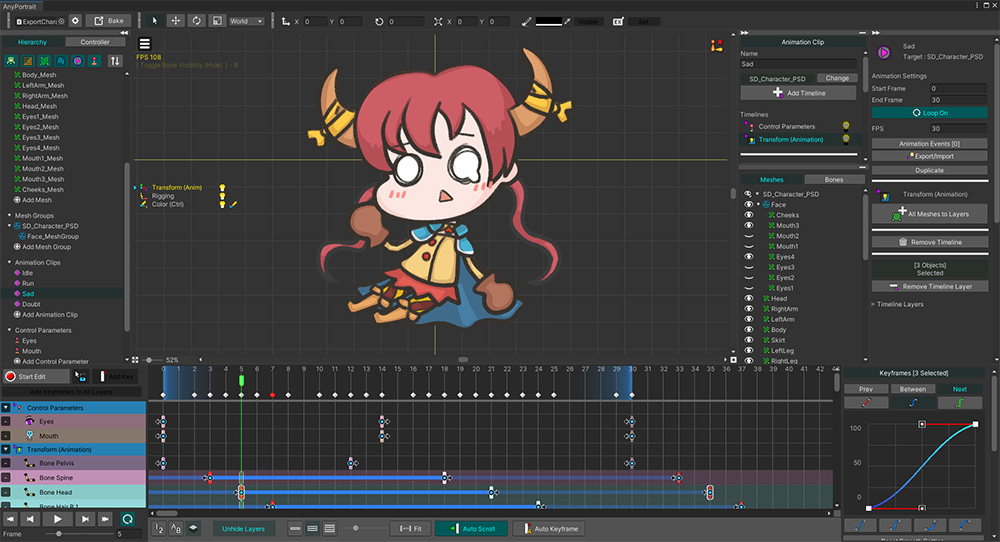
If you open it with AnyPortrait editor, the data is not damaged and you can continue to edit and use it.
Export and import the Prefab
As above, when many other objects as well as the character to be copied are placed in the scene, it is difficult to export the whole scene.
Of course, you can also copy ( Ctrl+C, V ) the target character to the new empty scene in the same project, and export that scene.
But in this case, it is also good to use Prefab.
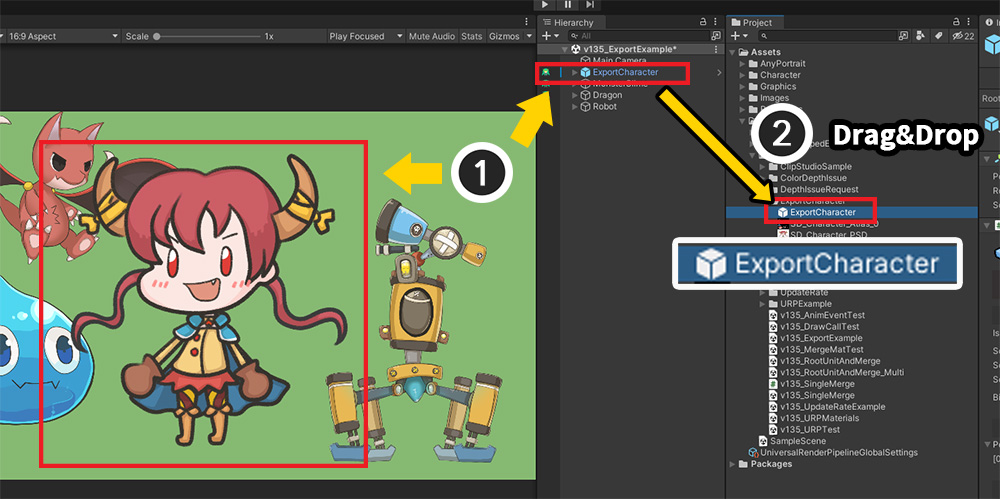
(1) Select the character you want to copy in the Hierarchy UI.
(2) Drag the character to the Project UI to convert it to a Prefab.
If you created a character as a prefab, it now exists as a separate file.
Simply copy this prefab file to another project and you're done.
In fact, AnyPortrait's internal data is copied without damage.
However, copying only the prefab is not appropriate as it will break links with other assets such as textures.
So we will use the Unity Package here as well.
The export process is almost identical.
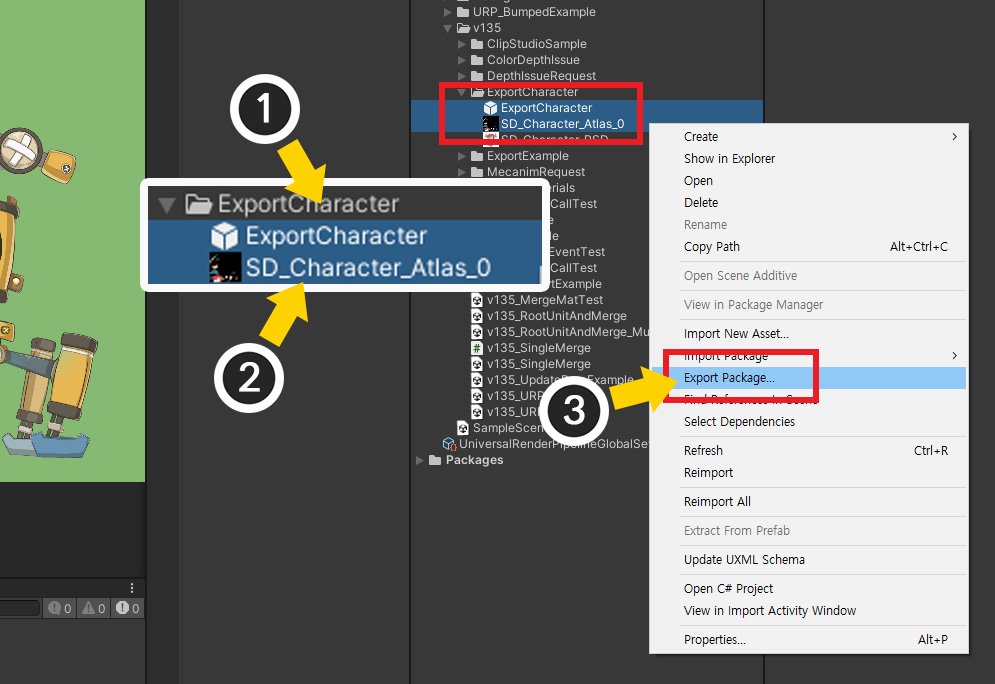
Select (1) Character Prefab and (2) Texture Asset together.
(Please select other assets to be exported together at this time.)
(3) Select Export Package from the right-click menu.
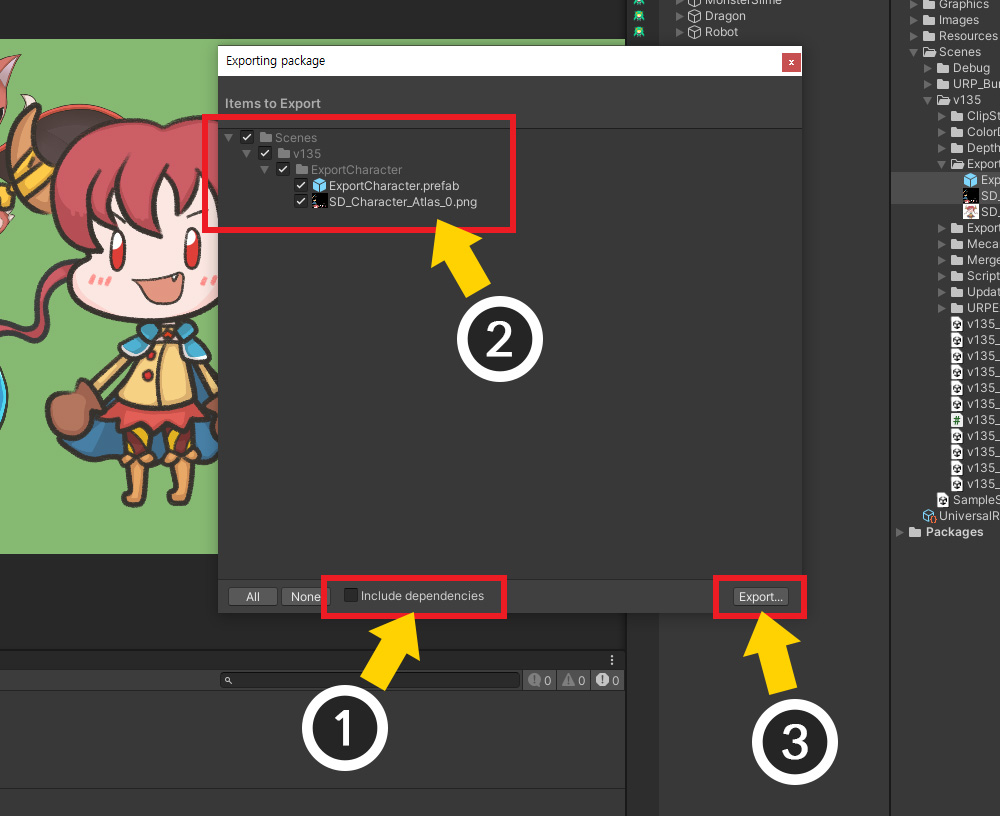
(1) Uncheck Include dependencies.
(2) Prefabs and texture assets appear in the list.
(3) Click the Export button to save the Unity package file.
Open a new project. Likewise, the same version of AnyPortrait must be installed.
(1) Double-click the saved Unity package file or (2) Drag it into the project.
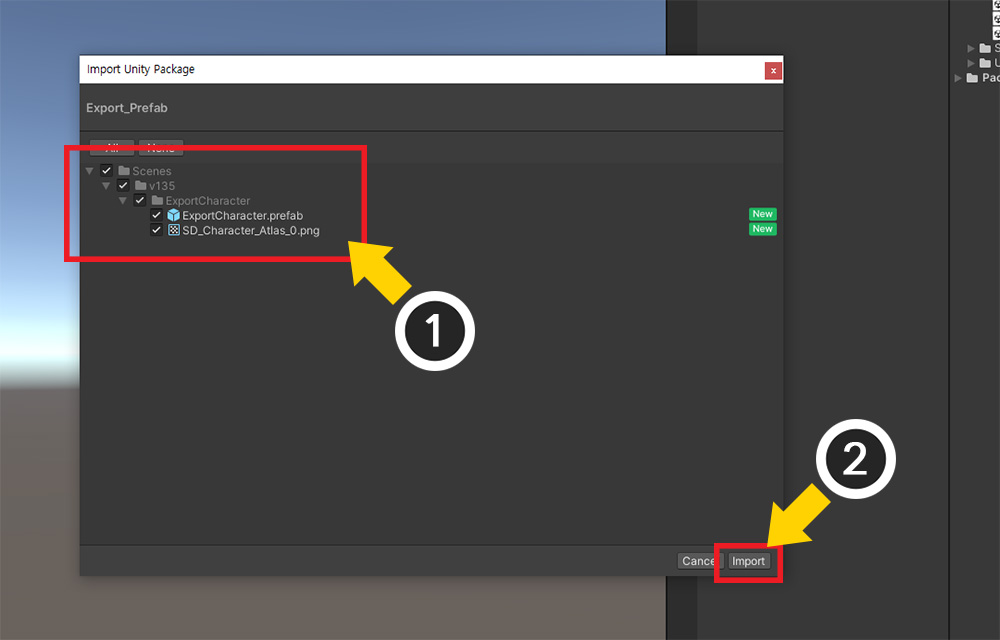
(1) Prefab and Texture Asset to be imported into the current project appear in the list.
(2) Press the Import button.
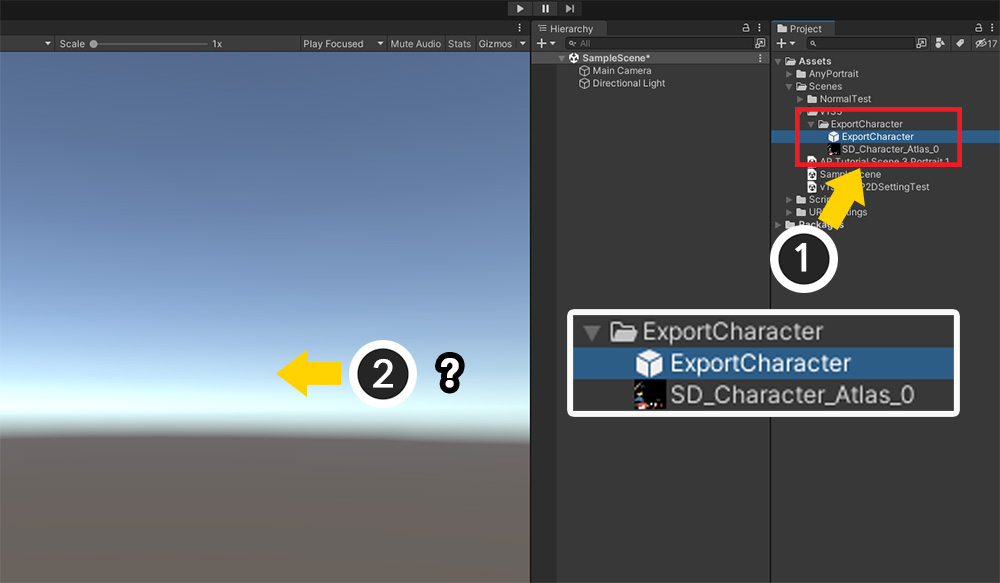
(1) Character prefab and texture asset are copied normally.
(2) But this time, we didn't copy the scene, so we can't see the character yet.
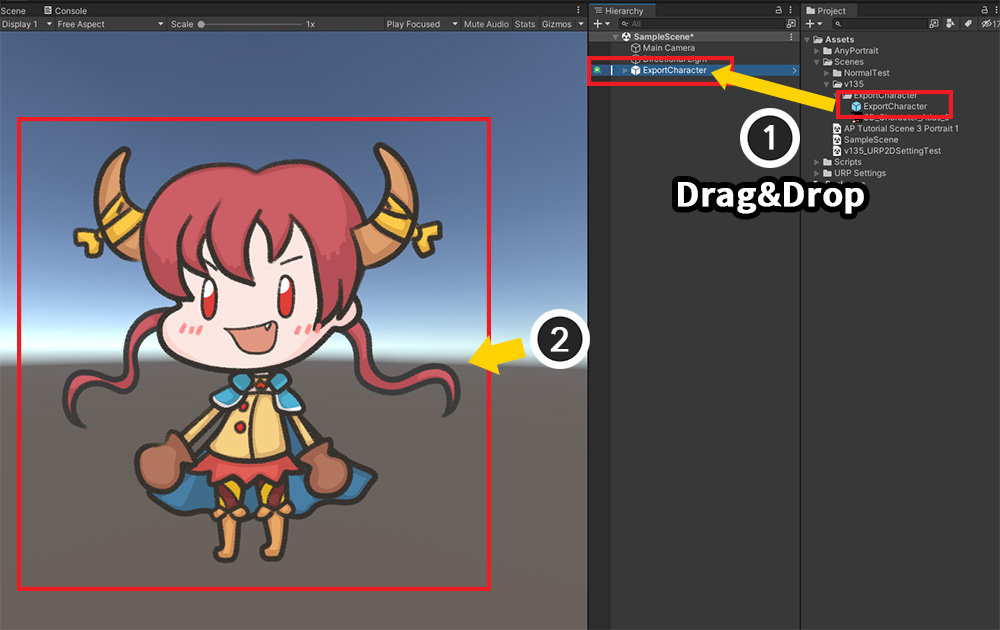
(1) Drag the Prefab to place it in the scene.
(2) You can check the character in the scene view.
If the character is not visible, select it and click the Refresh Meshes button in the Inspector.
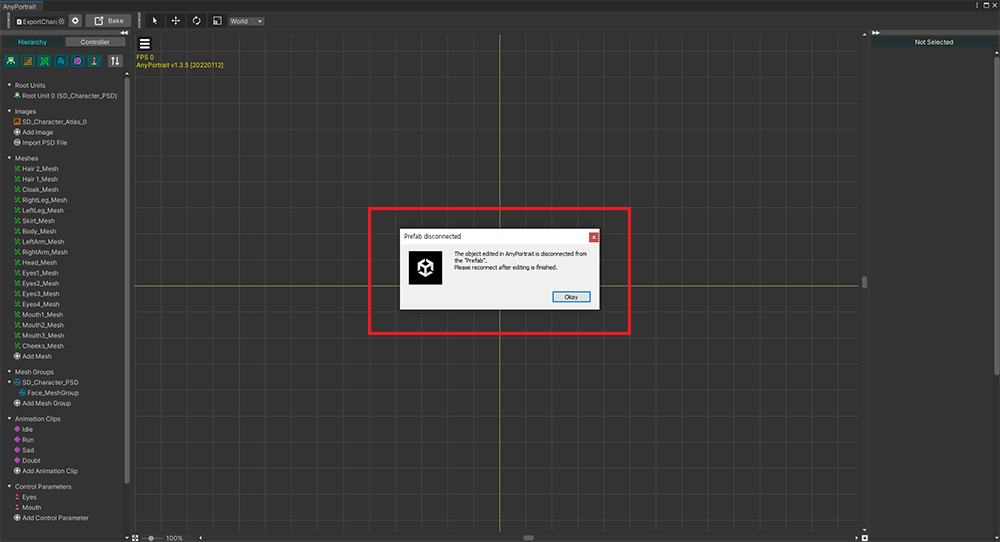
The problem is, AnyPortrait doesn't allow prefabs to be edited.
When you open AnyPortrait editor to edit a character, the message above appears.
Press the Okay button.
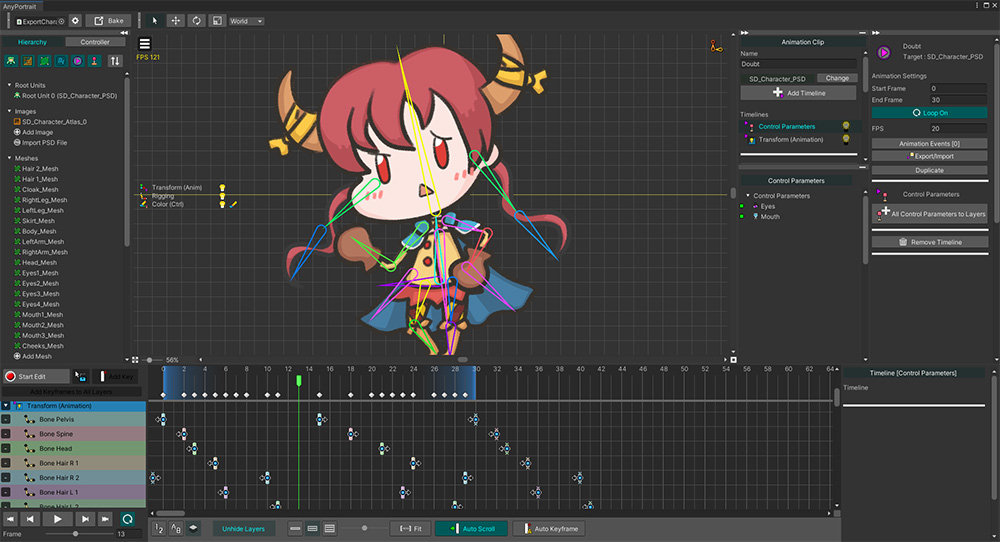
The link to the prefab is now disconnected and ready for editing.
You can see that the character data is copied normally even in the export method using the prefab.
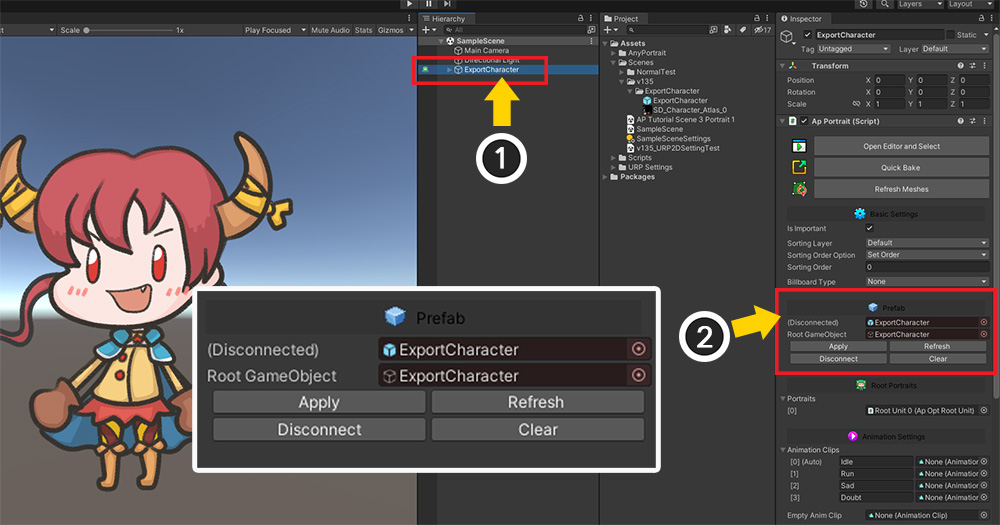
After editing, run Bake and return to the Unity scene.
(1) Select the character.
(2) You can see that UIs related to the prefab have been added to the Inspector.
These are the functions to reconnect(Apply) or disconnect the connection with the prefab.
More information about Prefabs can be found at the related page.