AnyPortrait > Manual > Rotoscoping
Rotoscoping
1.4.7
Rotoscoping refers to a technique for creating animation by referring to photos or a video frame by frame.
This can be used to make realistic movements effectively.
Likewise, it would be nice to have the ability to create animations while viewing photos or images for your reference.
This page introduces features inspired by the idea of the rotoscoping technique.
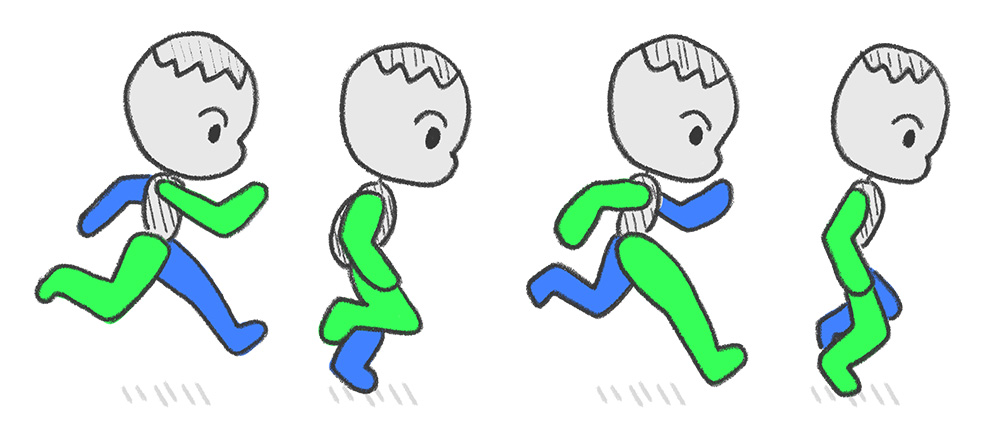
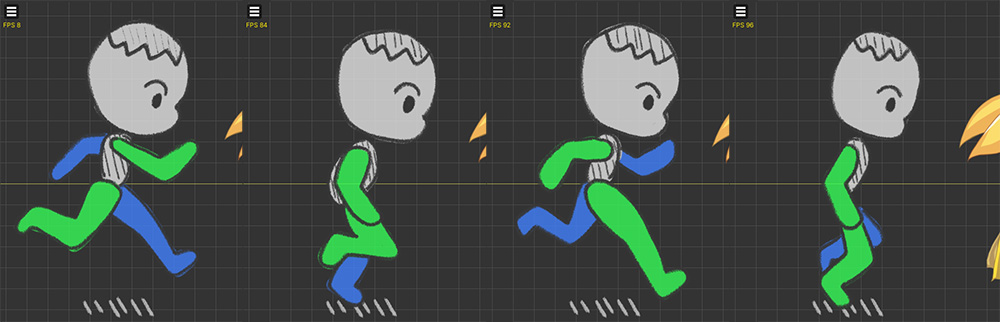
We prepared 4 images of running characters.
On this page, we explain with simple drawn images, but it's also a good idea to use photos.
Now let's load these images into the workspace.
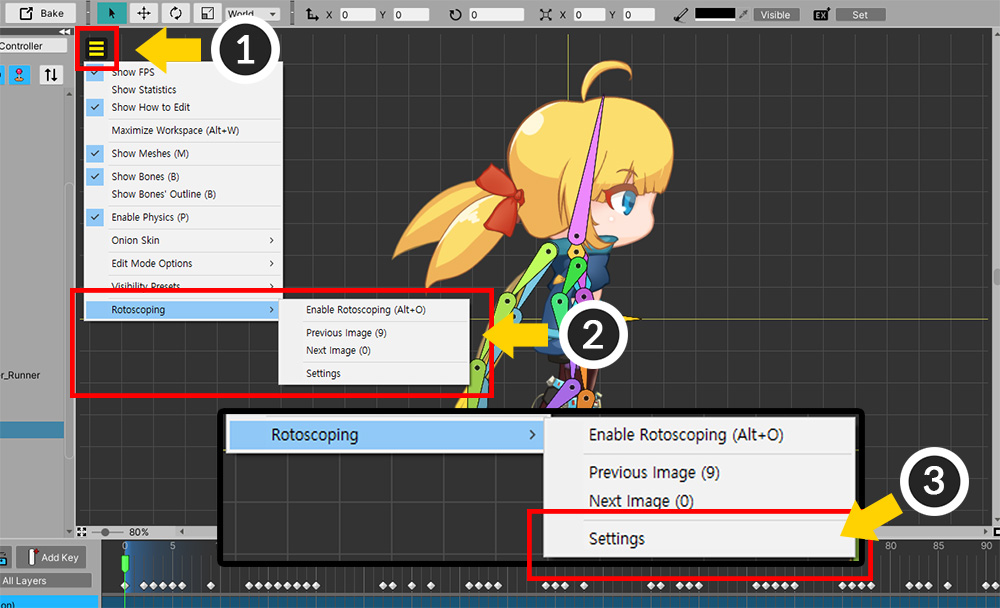
(1) Open the View Menu.
(2) Select the Rotoscoping menu.
(3) Since you have not yet set which image to load, select Rotoscoping > Settings.
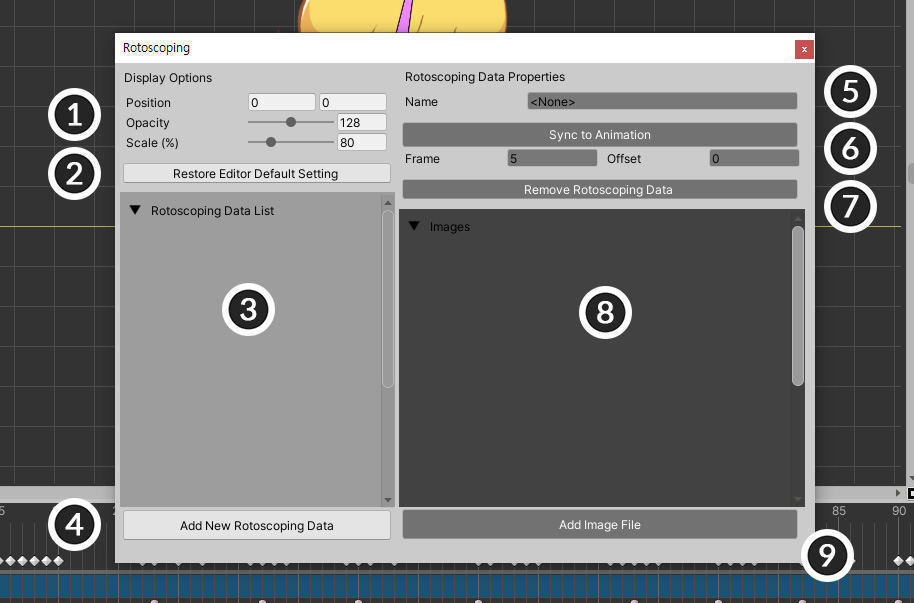
This is the Rotoscoping setting window
1. Display Options : Set how external images will be displayed in the workspace.
2. Restore Editor Default Setting : Reset Display Options.
3. Rotoscoping Data List : This is a list of created rotoscoping data.
4. Add New Rotoscoping Data : Create new rotoscoping data.
5. Name : Name of the rotoscoping data.
6. Animation Property : Images can be automatically switched by synchronizing with the frame of the animation.
7. Remove Rotoscoping Data : Delete the selected rotoscoping data.
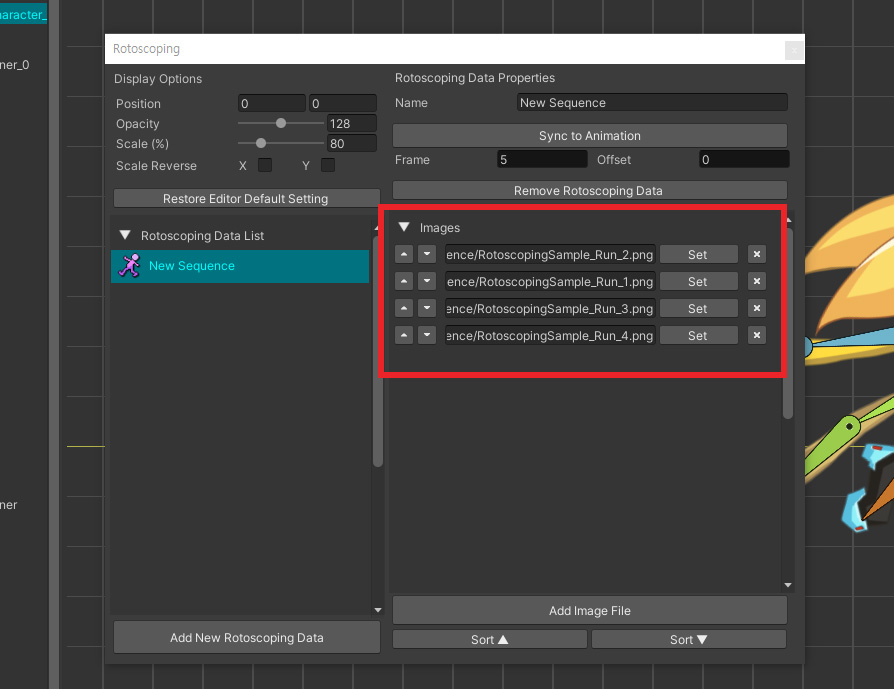
8. Images : These are the images included in the selected rotoscoping data.
9. Add Image File : Adds an external image file to the selected rotoscoping data.
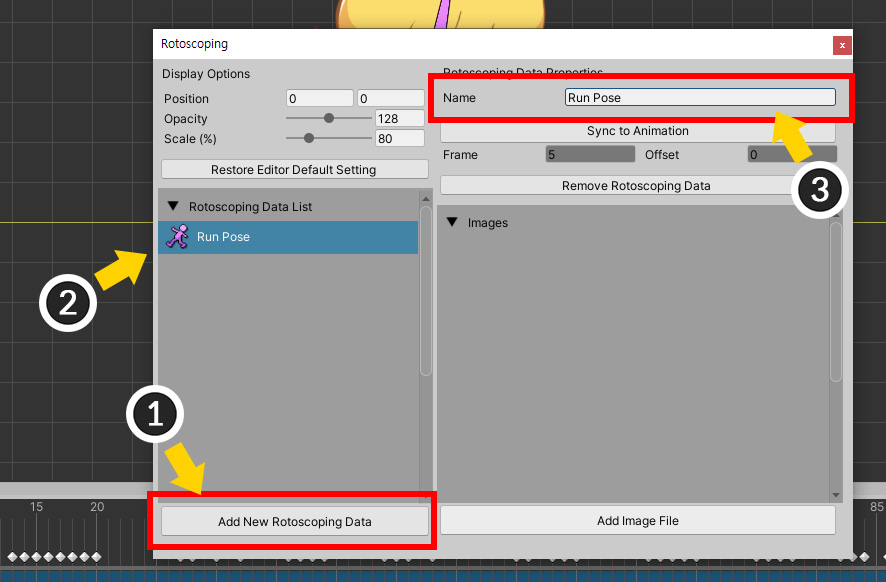
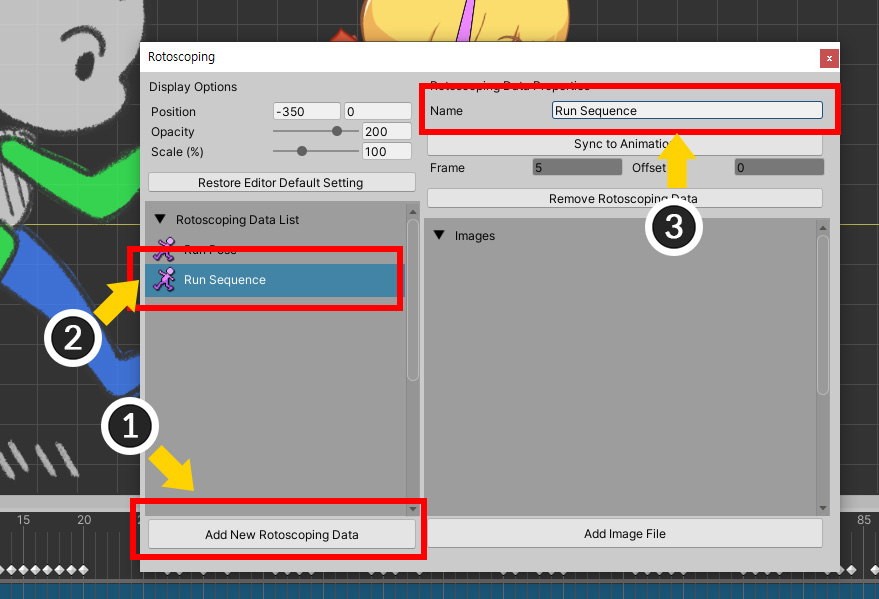
Let's create new rotoscoping data and load the image.
(1) Click the Add New Rotoscoping Data button.
(2) New rotoscoping data has been created. Select the rotoscoping data.
(3) Set the name of the rotoscoping data.

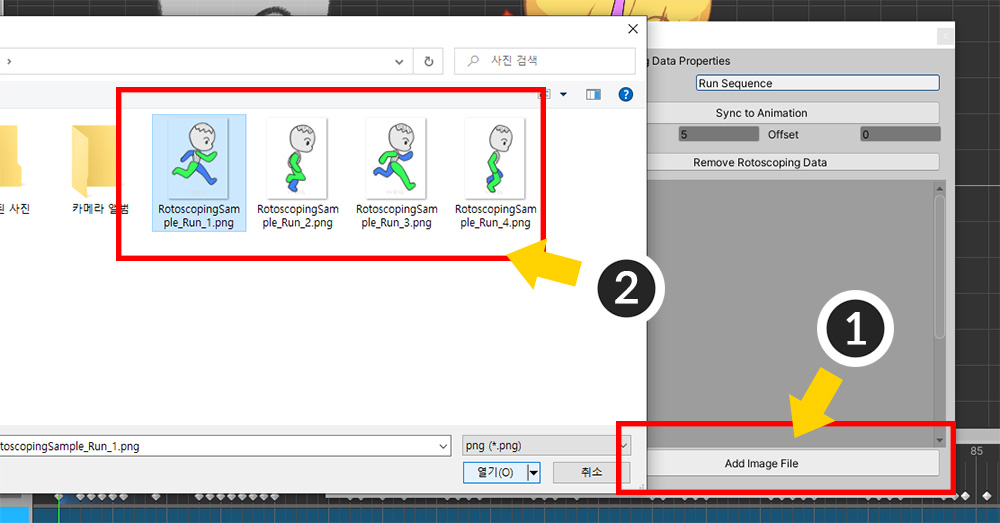
(1) Click the Add Image File button.
(2) Select and load one prepared image file.
Now this rotoscoping data can be used to display image files in the workspace.
Close the Rotoscoping Settings window.
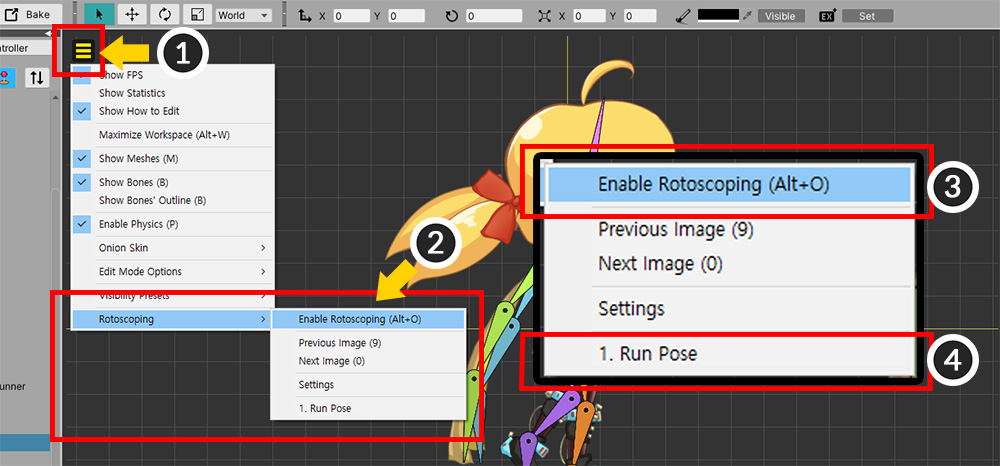
(1) Open the View Menu again.
(2) If you open the Rotoscoping menu, you can see that the generated Rotoscoping data has been added.
(3) Press Enable Rotoscoping (shortcut Alt+O ).
(4) If Rotoscoping Data is not selected, select Rotoscoping Data from the View menu.
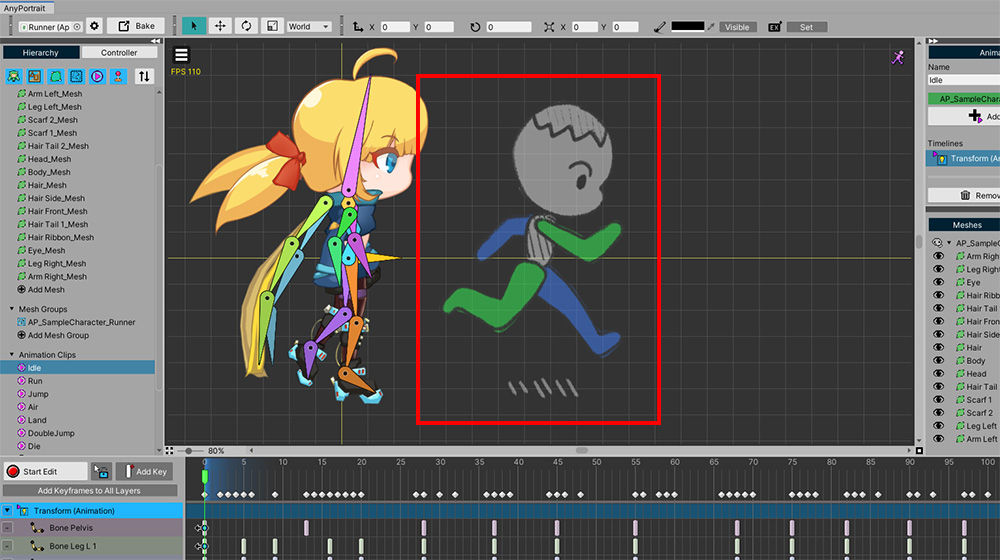
You can see the image you set up appears in the workspace.
You can even change the position, size and opacity of the image to suit your working style.
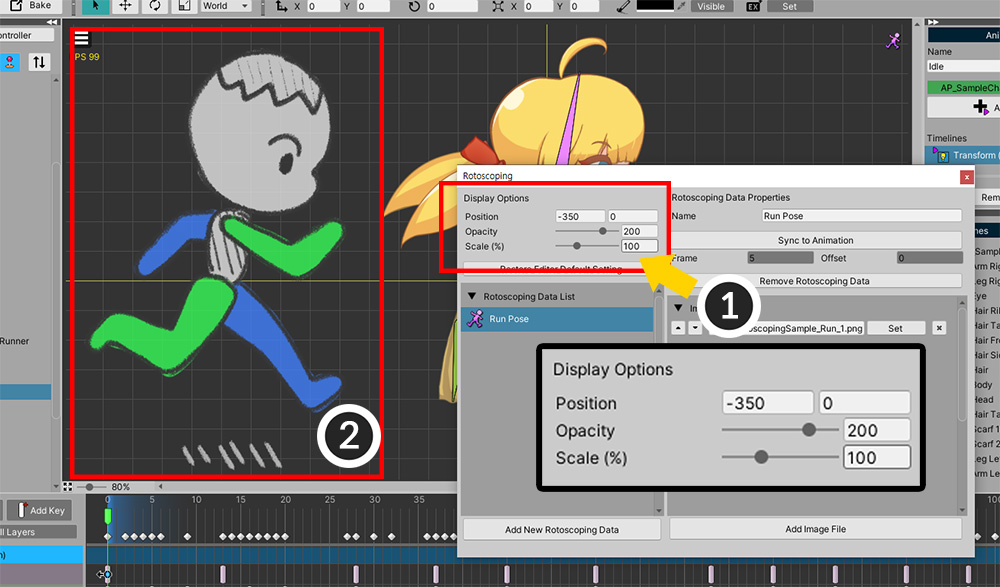
(1) Open the Rotoscoping setting and change the items in Display Options as appropriate.
(2) You can see the position, opacity, and size of the image change.
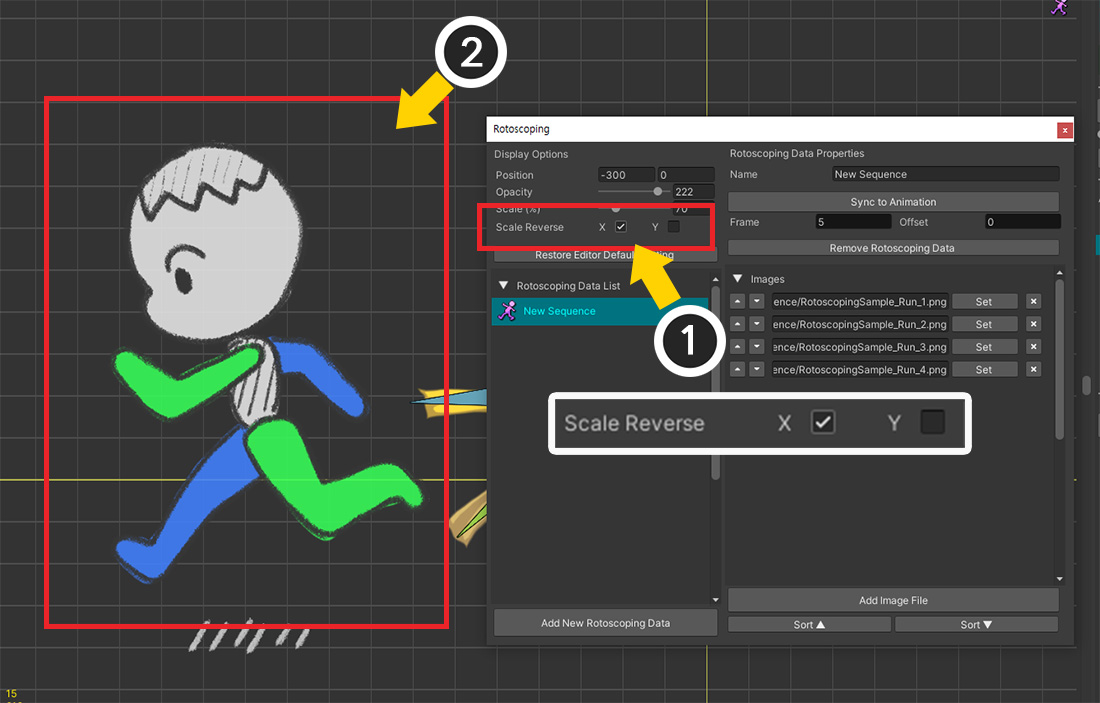
Using the option added in v1.4.7, you can reverse the scale for the X and Y axes.
Loading multiple image files
It is also possible to open and refer to multiple image files.
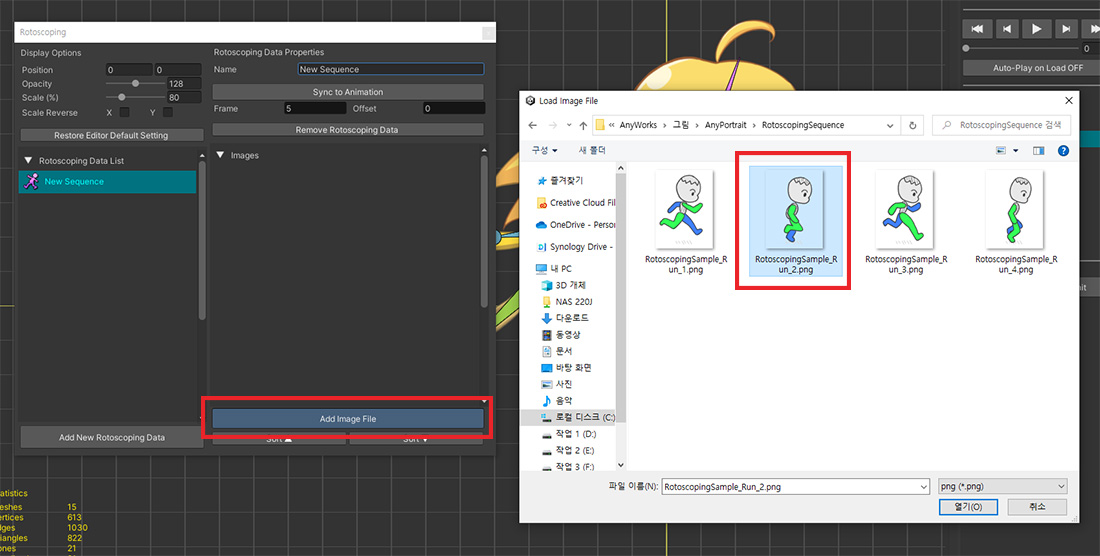
Let's create new rotoscoping data and load multiple image files.
(1) Open Rotoscoping Settings and click the Add New Rotoscoping Data button.
(2) New rotoscoping data has been created.
(3) Set the name of the rotoscoping data.
(1) Click the Add Image File button and (2) load the image file.
Repeat this operation to open all four prepared image files.
Open files with similar names at once
1.4.7
If the names of consecutive image files you want to open are the same except for the numbers, you can open them at once.
There are four files within the folder with identical names except for the numeric names.
Select one of these files.
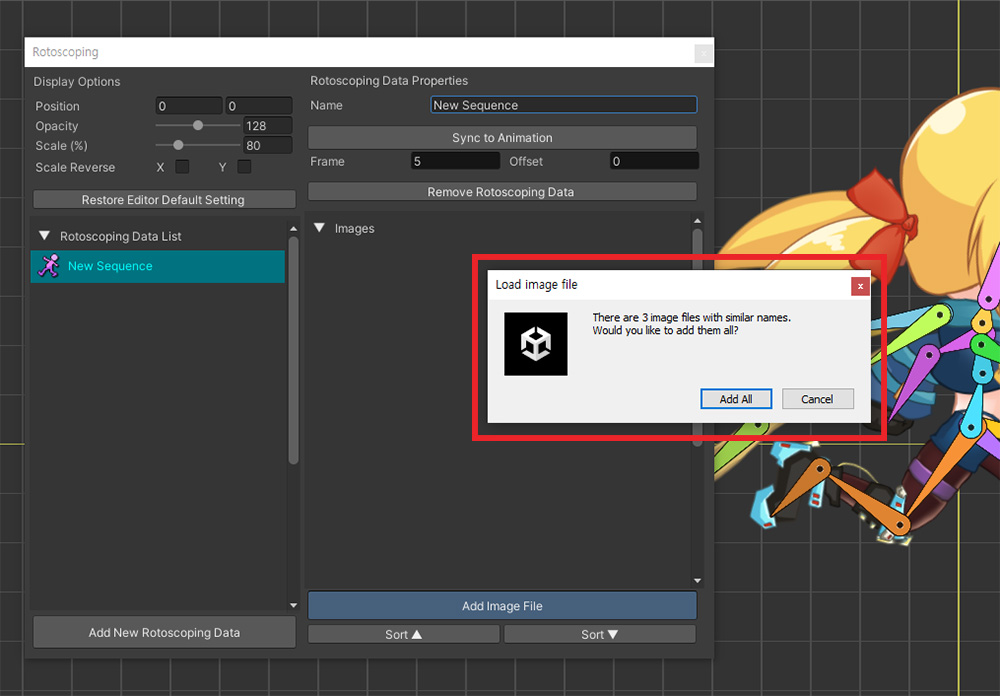
If there are files that appear as consecutive images in the folder, the message above will be displayed.
When you press the Add All button, all image files with similar names in that folder are added at once.
You can see that 4 image files in the folder have been added at once.

You can quickly sort image files by name by pressing the Sort button.
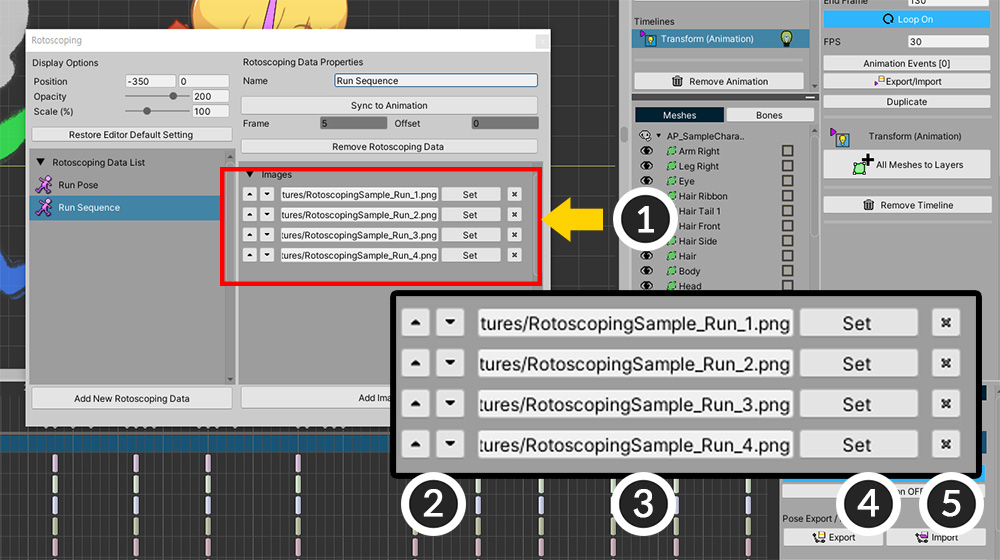
(1) Four files have been added to the rotoscoping data.
If you want to modify the image file loading information, use the UIs below.
(2) If you want to change the order, press the up or down button.
(3) The name and path of the file.
(4) Click the Set button to load another image file.
(5) This is the Delete button.
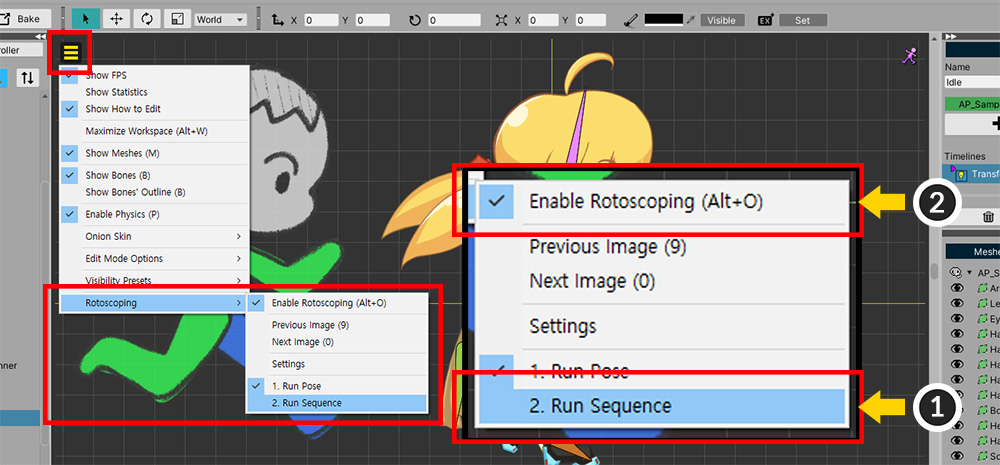
Let's apply rotoscoping data in the same way as above.
Clos the Rotoscoping setting and open the View menu.
(1) Select the created rotoscoping data.
(2) Click Rotoscoping > Enable Rotoscoping.
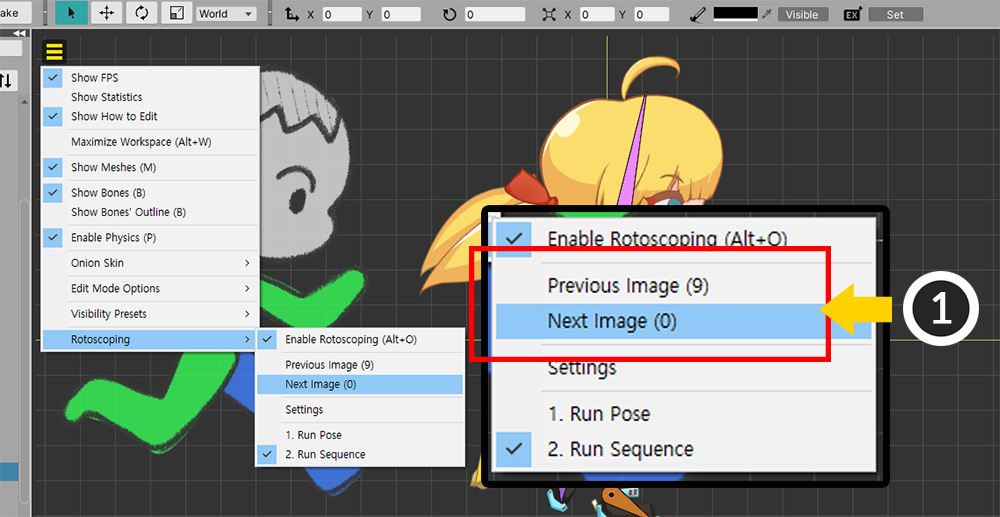
(1) You can switch images by pressing Previous Image, Next Image (shortcut Number 9, 0 ) in the View menu.
Now you can create animation by viewing 4 image files one by one in the workspace.
Automatically switching images in sync with animation
If the image is automatically switched as the animation plays, more efficient work will be possible.
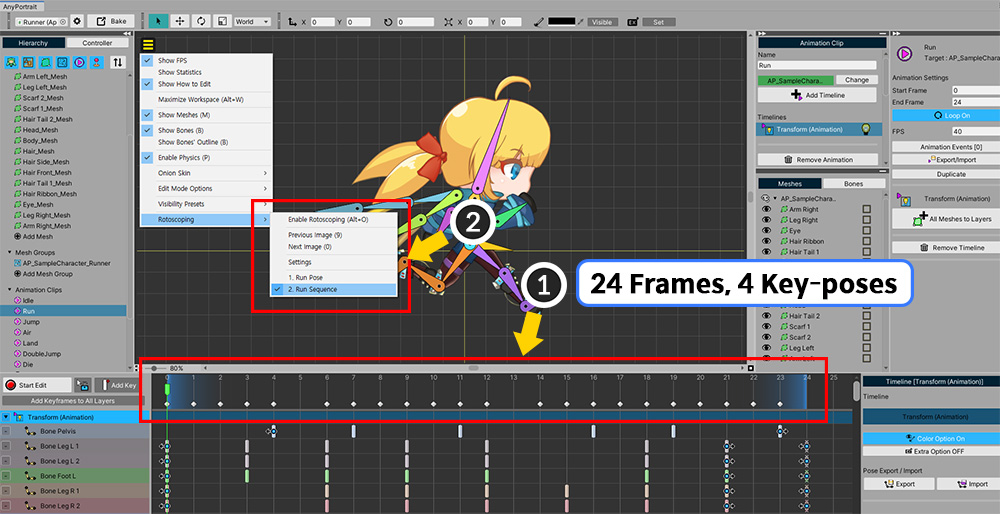
(1) The target animation is 24 frames in total and has 4 key-poses. In other words, the key-pose changes every 6 frames. (Let's remember 6 frames.)
(2) Let's make this animation and the rotoscoping data we just created in sync.
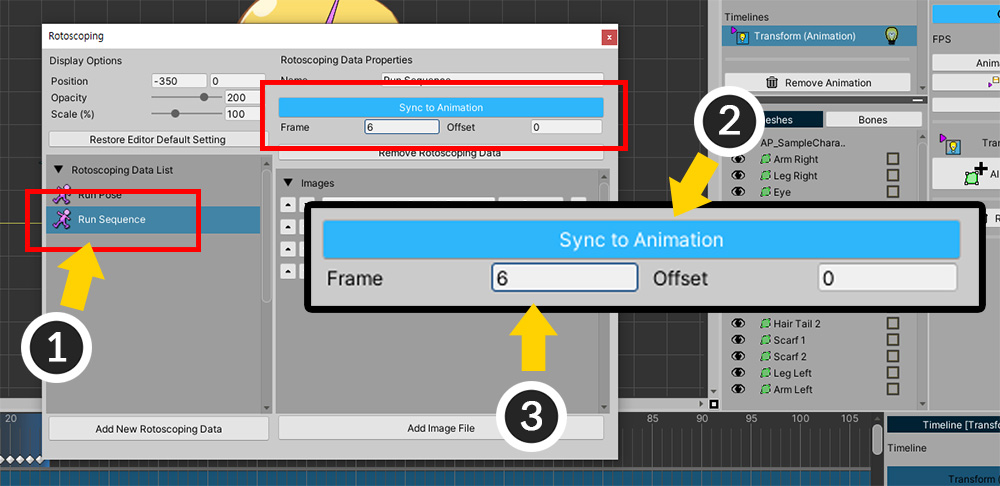
(1) Open Rotoscoping Settings and select the Rotoscoping data you just created.
(2) Click the Sync to Animation button to activate the synchronization function.
(3) Set Frame to 6.
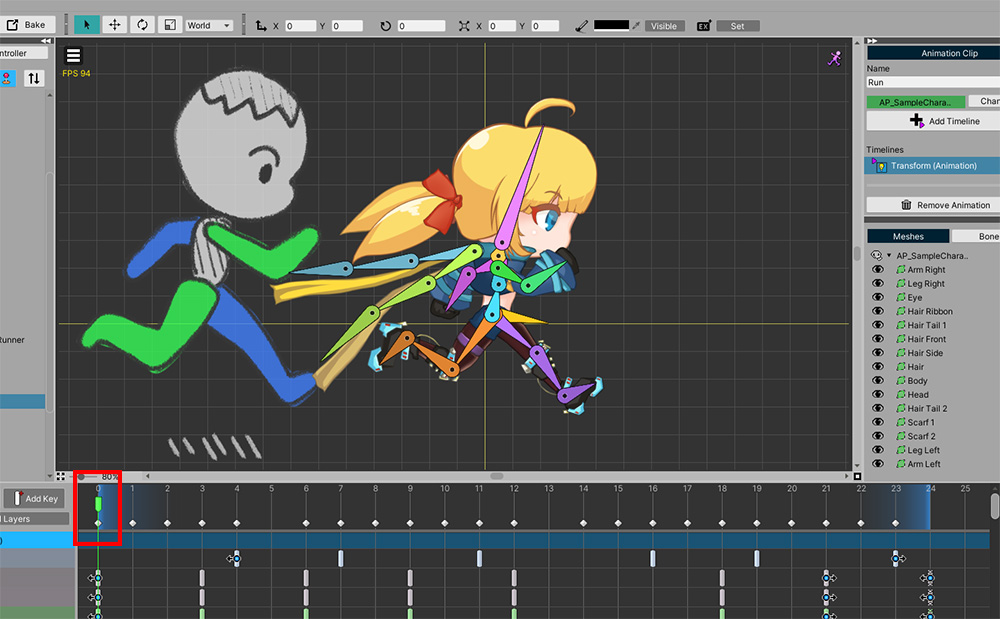
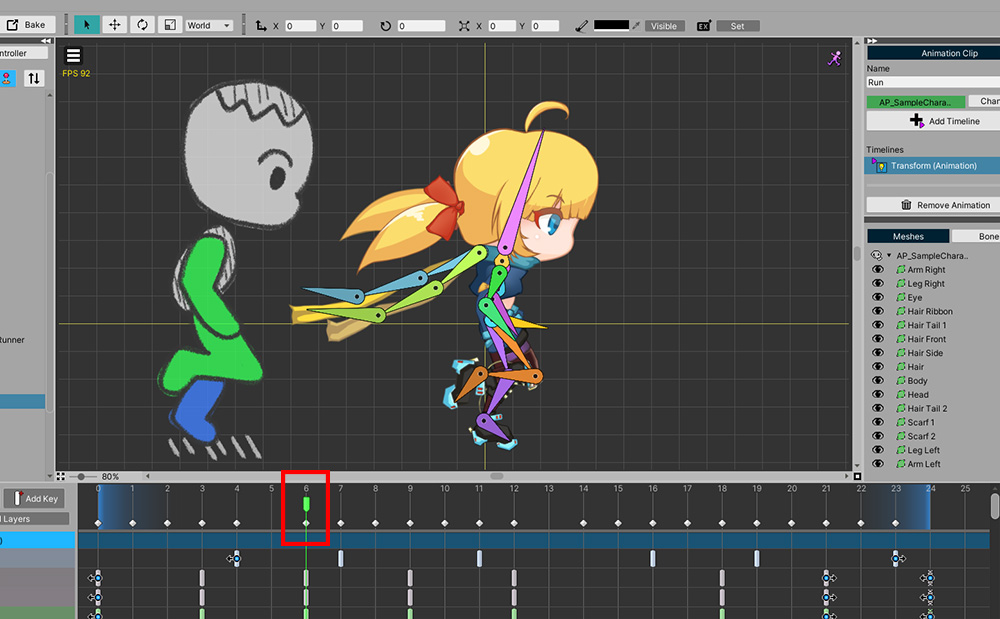
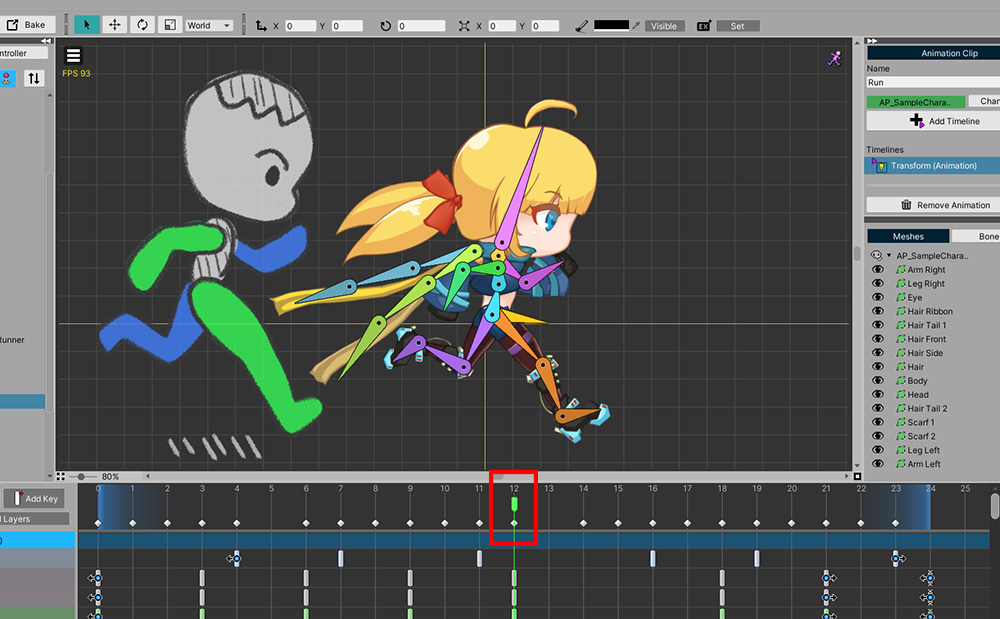
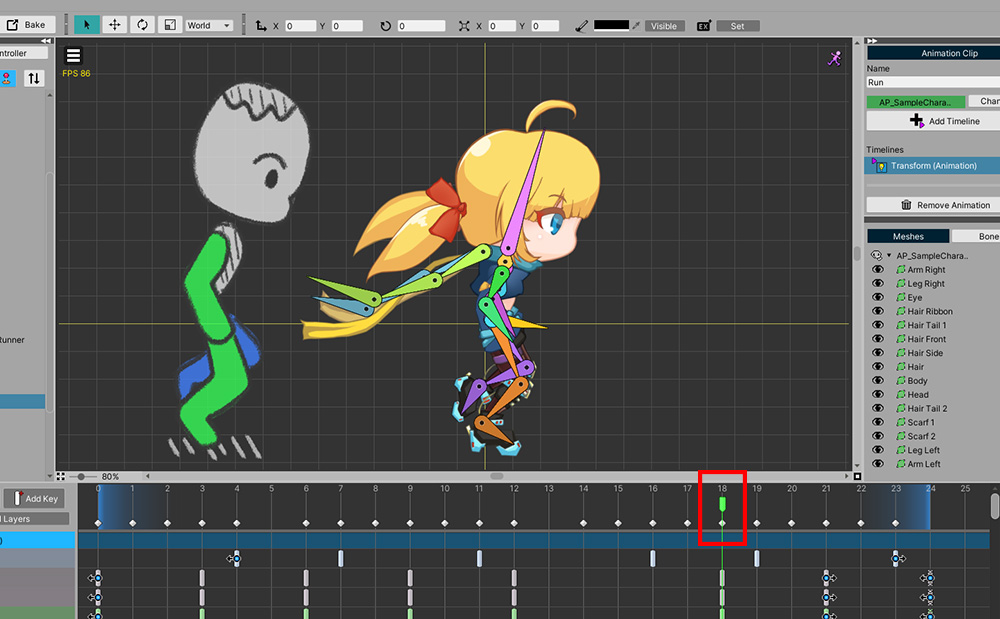
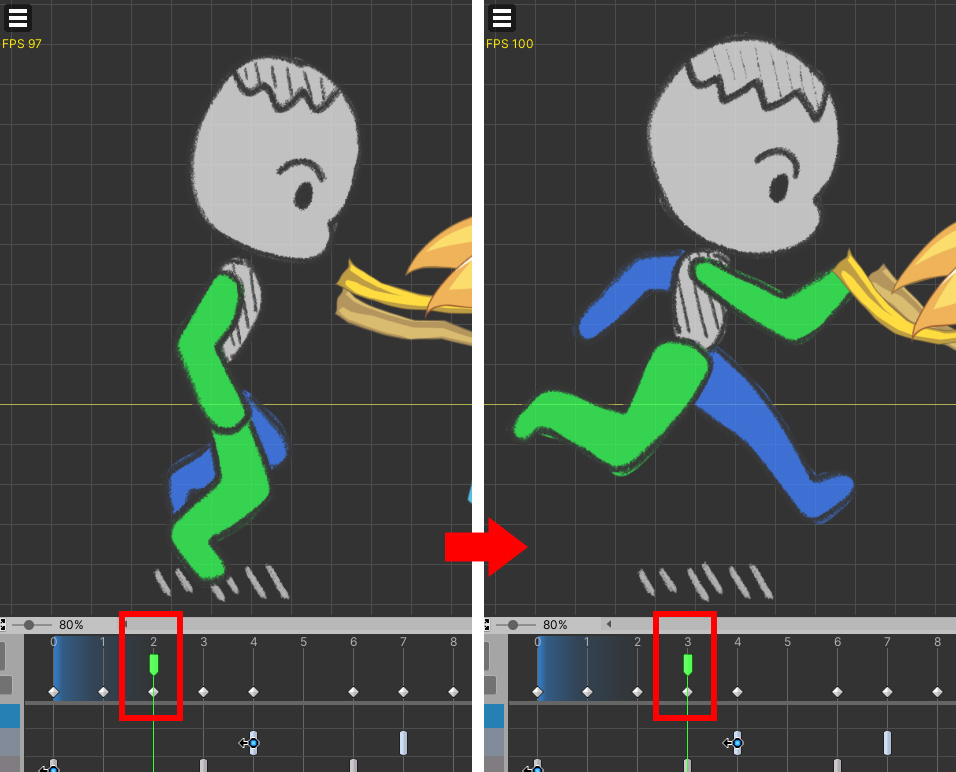
If you turn on the Rotoscoping and play the animation, you can see that the Rotoscoping images are automatically switched as shown above.
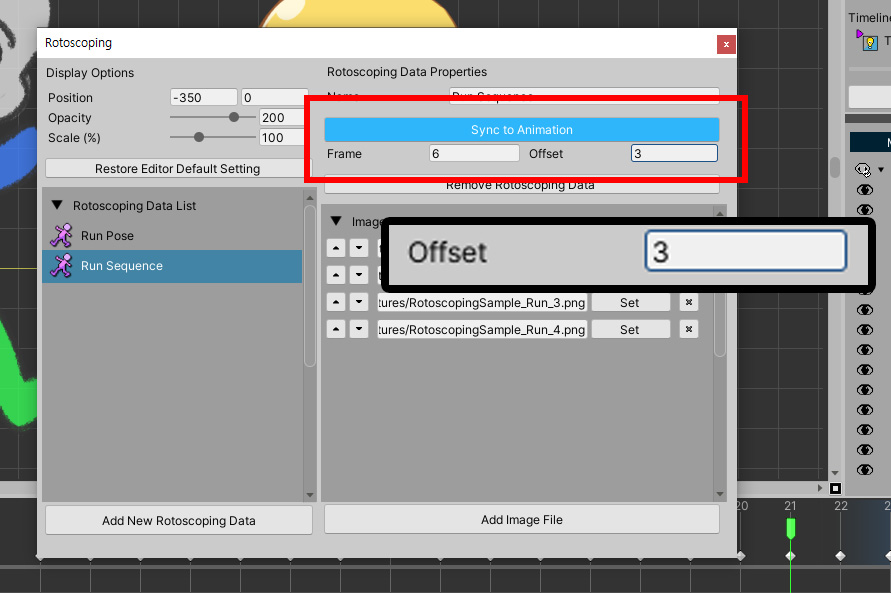
If the frame of the first key pose of the animation is not 0, you need to change the start frame.
Open the Rotoscoping settings and change Offset accordingly.
Now you can see that the frame of reference of the first Rotoscoping image has changed to fit Offset.