AnyPortrait > Manual > Using the Unity Recorder
Using the Unity Recorder
1.2.5
Among the packages provided by Unity, there is an interesting package called "Unity Recorder".
This is a package that provides the ability to record the game screen of the Unity Editor and save it as an image or video.
It is still a preview stage package, but unexpectedly, many users have inquired about compatibility with AnyPortrait.
On this page, we will explain how to shoot a character created with AnyPortrait with Unity Recorder.
It is also recommended to check the pages below.
- Unity Recorder 2.2 Official Tutorial
- Screen capture
Notice : Unity Recorder is still in preview, so it may be slightly different from the description on this page depending on the version.
The description on this page is based on Unity 2020.1 and Unity Recorder 2.2.
Install the Unity Recorder package and shoot a video
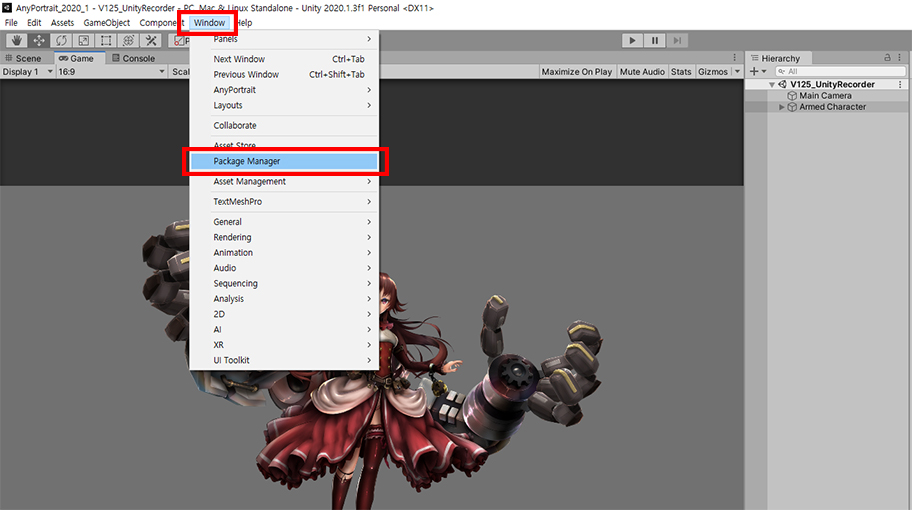
Select Window > Package Manager in Unity Editor.
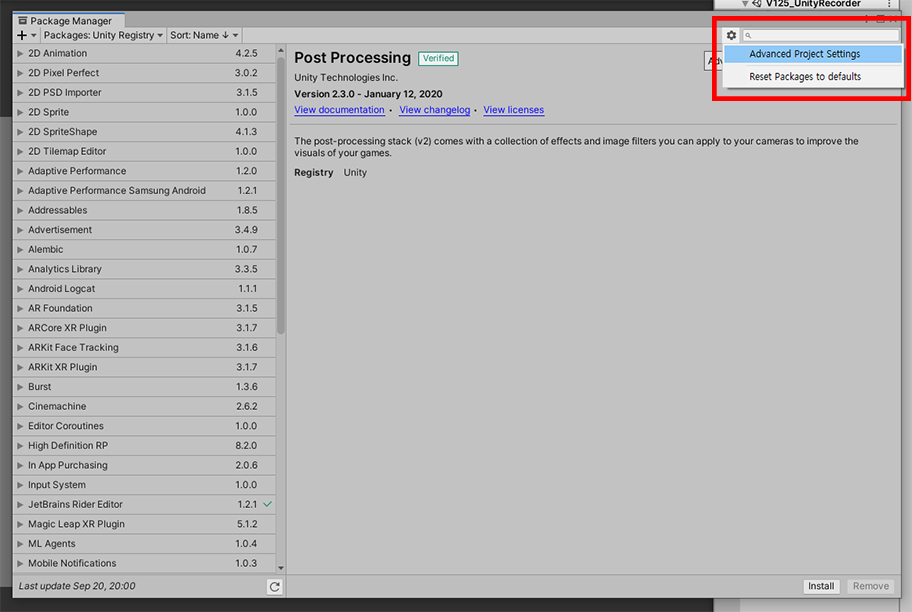
The Package Manager opens, but you won't see "Unity Recorder" in the list.
Click Settings button and then "Advanced Project Settings".
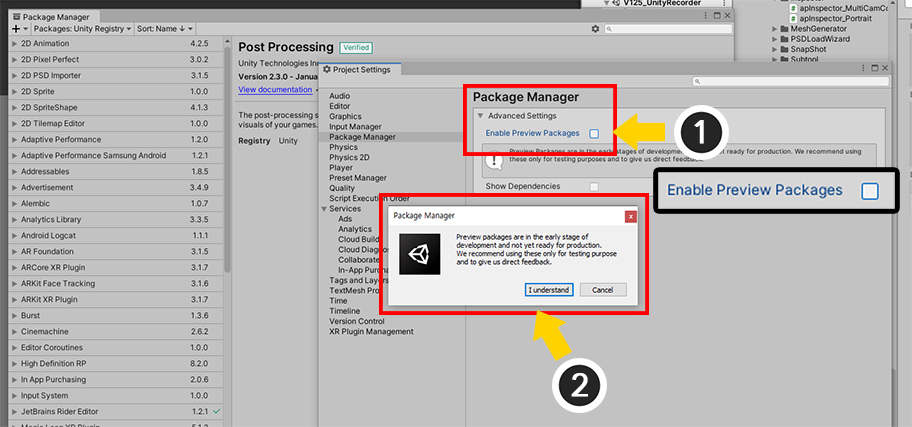
(1) The Enable Preview Packages checkbox is probably turned off. Enable this option.
(2) A message appears. Click the OK button.
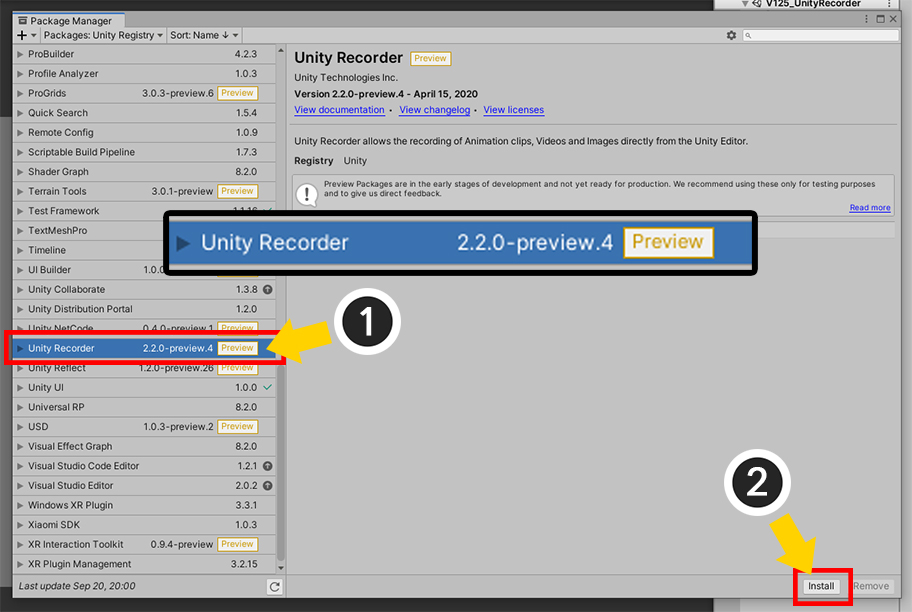
Let's go back to the Package Manager.
The Unity Recorder should now appear in the list.
(1) Select "Unity Recorder".
(2) Click the "Install" button.
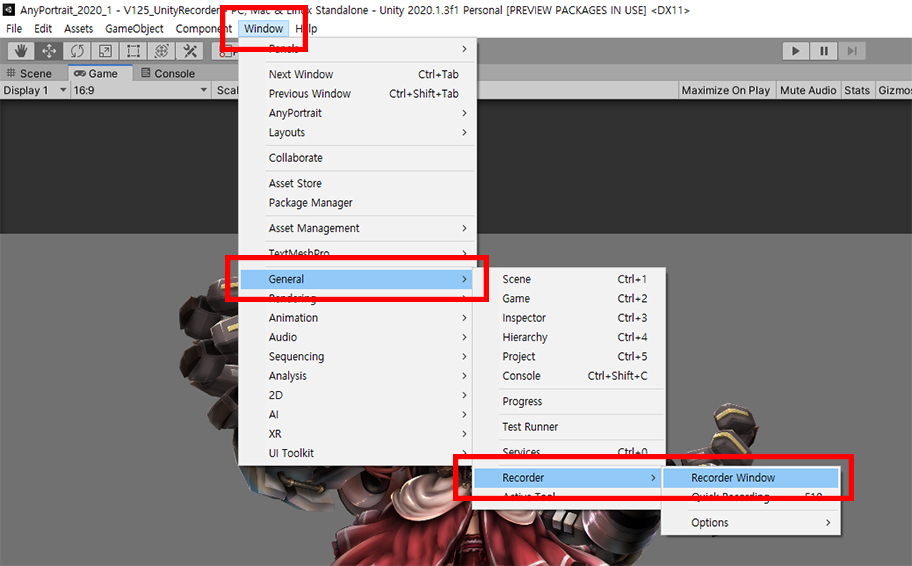
Close the Package Manager and select Window > General > Recorder > Recorder Window.
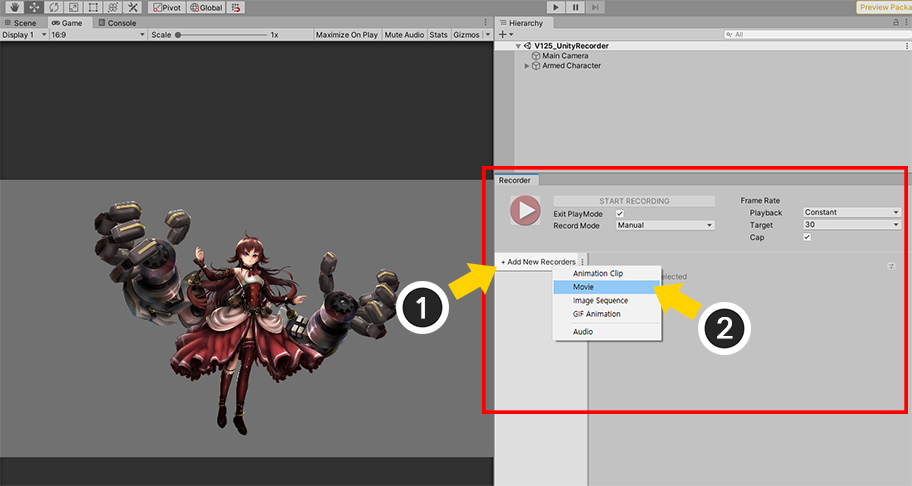
The Recorder UI appears.
(1) Click the "+Add New New Recorders" button.
(2) Let's select "Movie".

The setting screen for movie shooting appears.
1. You can set the “Frame Rate” of the movie.
2. You can select "Movie format" (MP4 or WEBM).
3. You can set the "File Path" and the "File Name".
4. You can set how the screen will be recorded.
5. You can select "Movie quality".
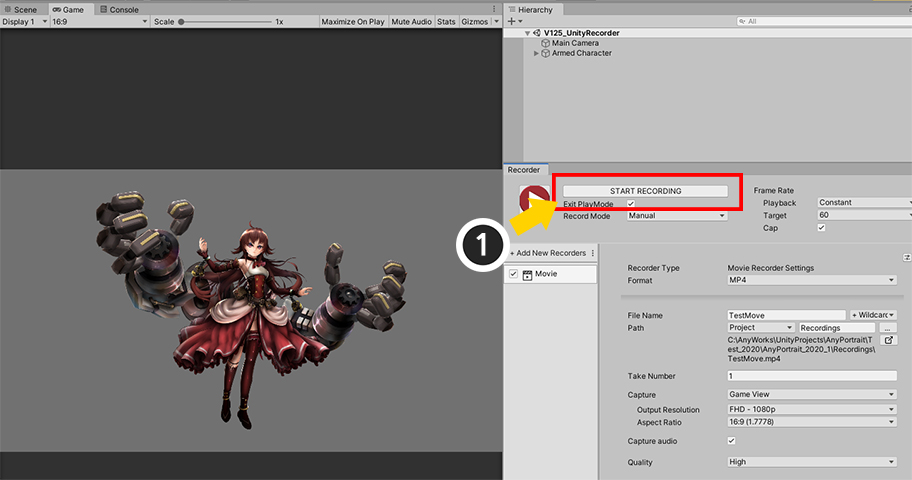
After setting the video recording settings, let's start recording.
Characters created with AnyPortrait are placed in the Unity scene, and animations are set to start automatically when the game starts.
(How to make animation run automatically)
(1) Press the "Start Recording" button.
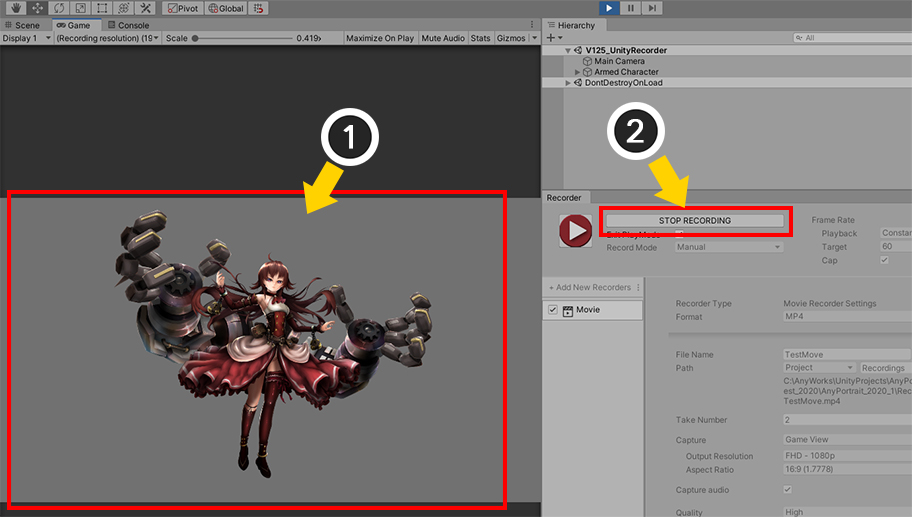
(1) The game starts automatically and the character animation is played.
(2) When it is determined that video recording is over, press the "Stop Recording" button.
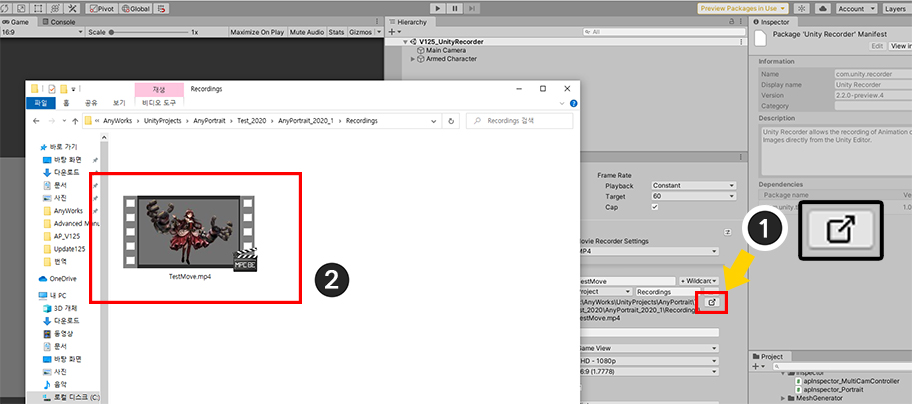
(1) Let's open the folder where the video file is saved.
(2) You can see the video saved nicely.

When recording a movie, if you set it to be saved under the same name, the file may be overwritten over and over again.
To prevent this, you can add date, time, number, etc. to the file name as above.
Saving as an image with a transparent background
When you need to make the background transparent and save it as an image, there is a problem that characters created with AnyPortrait are not rendered.
This problem is the same as the problem in Render Texture.
Please refer to the explanation below or Related Page for how to solve the problem when rendering with a transparent background.
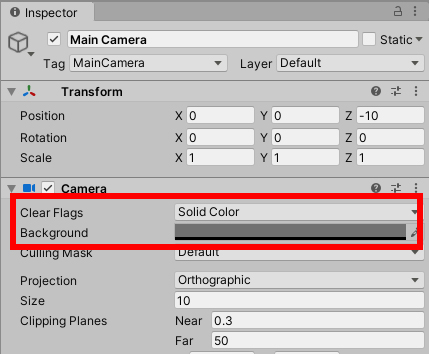
Change the camera settings to render with a transparent background.
Set "Clear Flags" to "Solid Color", and set "Alpha of the Background color" to "0".
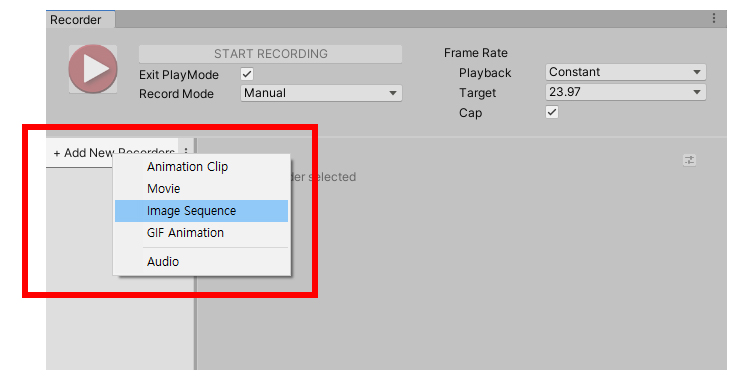
Click the "+Add New Recorders" button and select "Image Sequence".
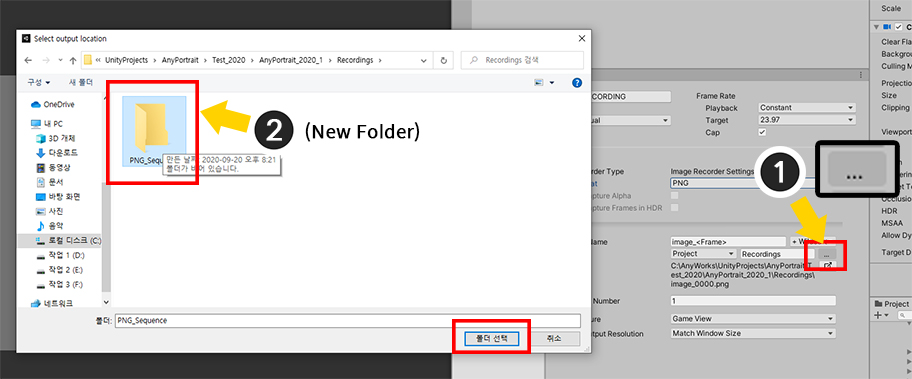
When exporting as image sequence files, a large number of image files are created, so it is recommended to save them in a separate folder.
(1) Click the button to change the saving path and (2) select a new empty folder.
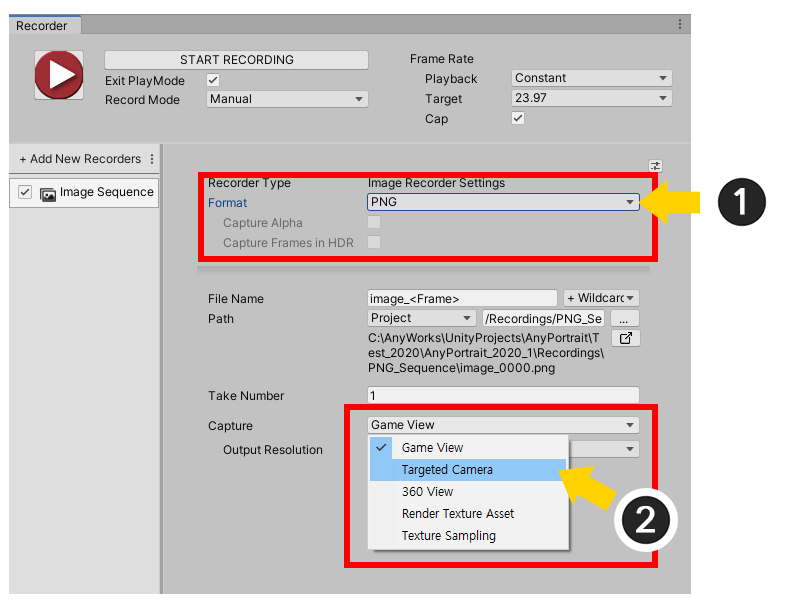
(1) Set the file format to "PNG".
(2) Change the "Capture" option to "Targeted Camera" instead of Game View, and check that the selected camera is a camera that was previously "set to render with a transparent background color".
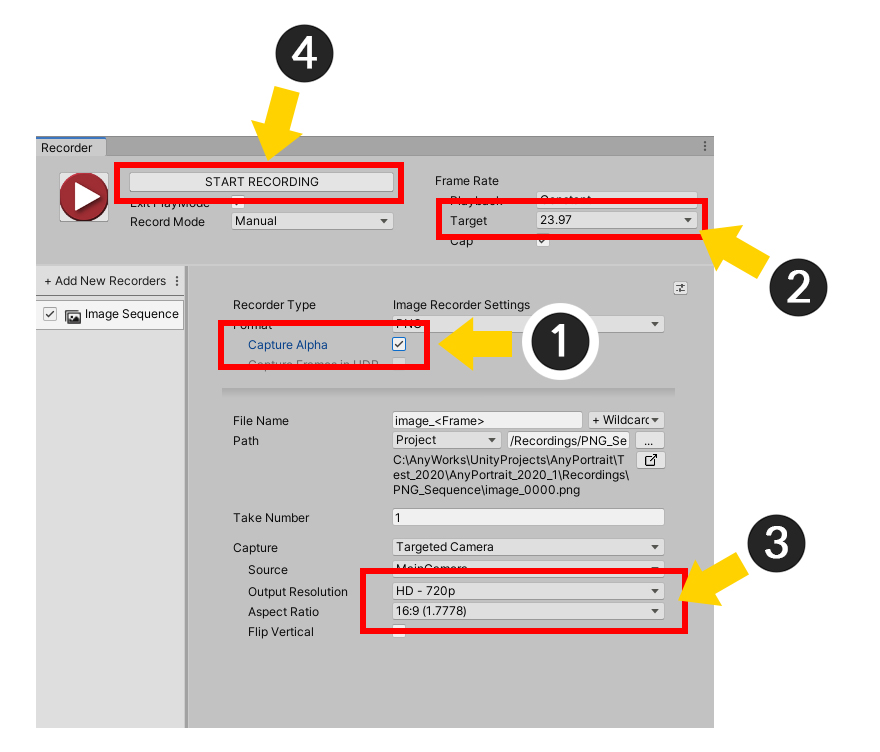
(1) Check the "Capture Alpha" option.
(2) Set the "Frame Rate". It is recommended to set a suitable frame rate so as not to create too many image files.
(3) Set the Screen size and ratio.
(4) Click the "Start Recording" button to start recording.
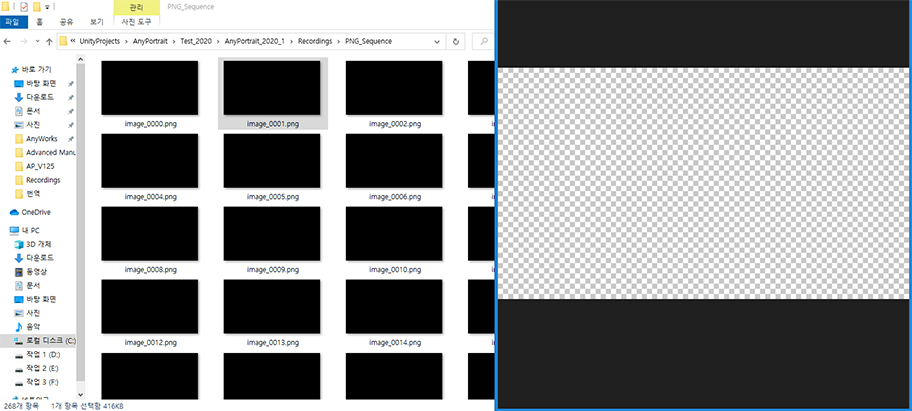
When you open the folder after recording, you can see that the character is not visible and only transparent images have been created.
This problem is the same for Render Texture, which can be solved by using KeepAlpha Material.
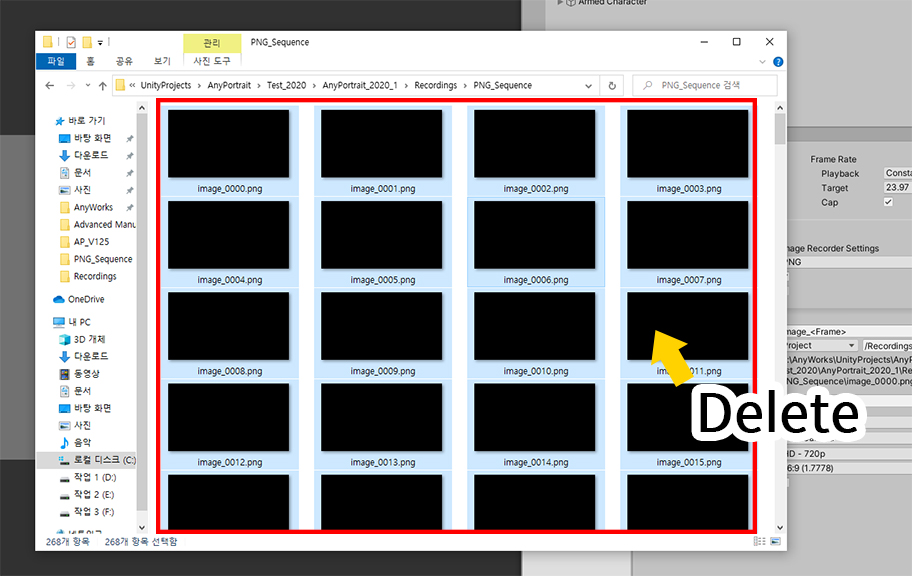
Before recording again, delete all files that were recorded incorrectly.

(1) Open the AnyPortrait editor, select a character, and click the "Material Library" button.
(2) Select the "KeepAlpha Presets" package.
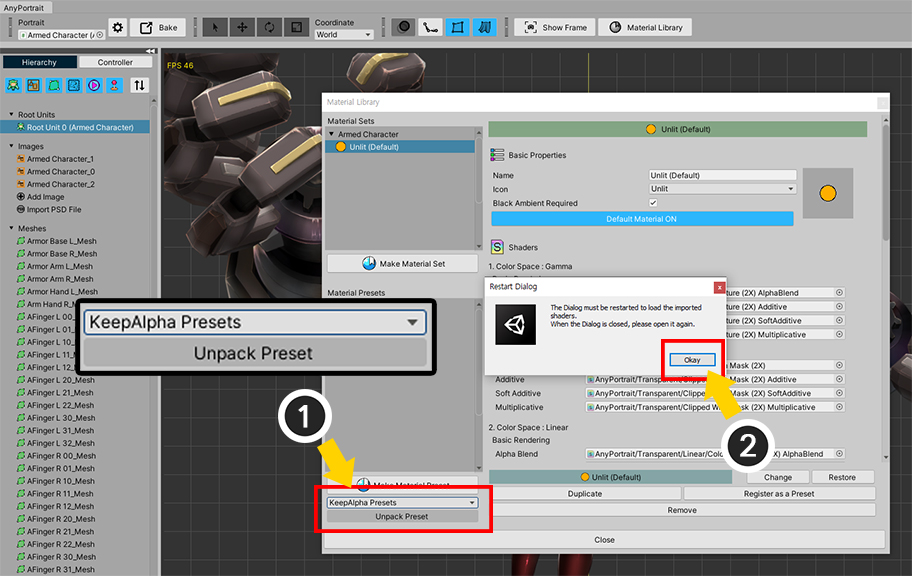
(1) Click the "Unpack Preset" button to install the KeepAlpha Presets package.
(2) During the installation process, a message appears indicating that the Material Library is closed. Click the OK button.
Open the Material Library again.
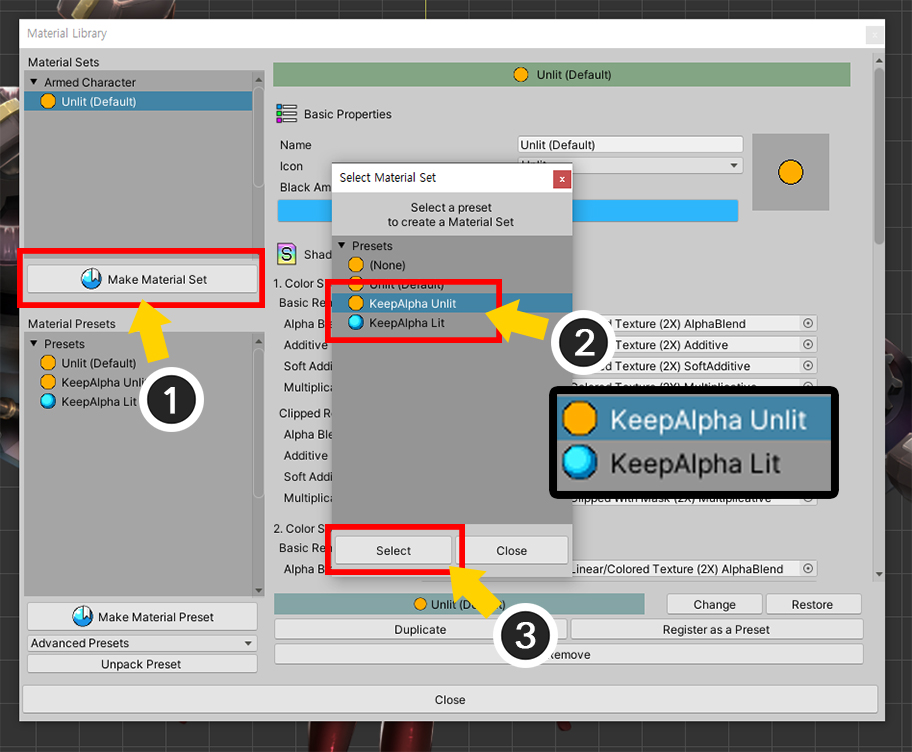
(1) Click the "Make Material Set" button.
(2) The installed "KeepAlpha presets" appear. Select "KeepAlpha Unlit" if you are recording the color of the original image, or "KeepAlpha Lit" if it is affected by light.
(3) Click the Select button.
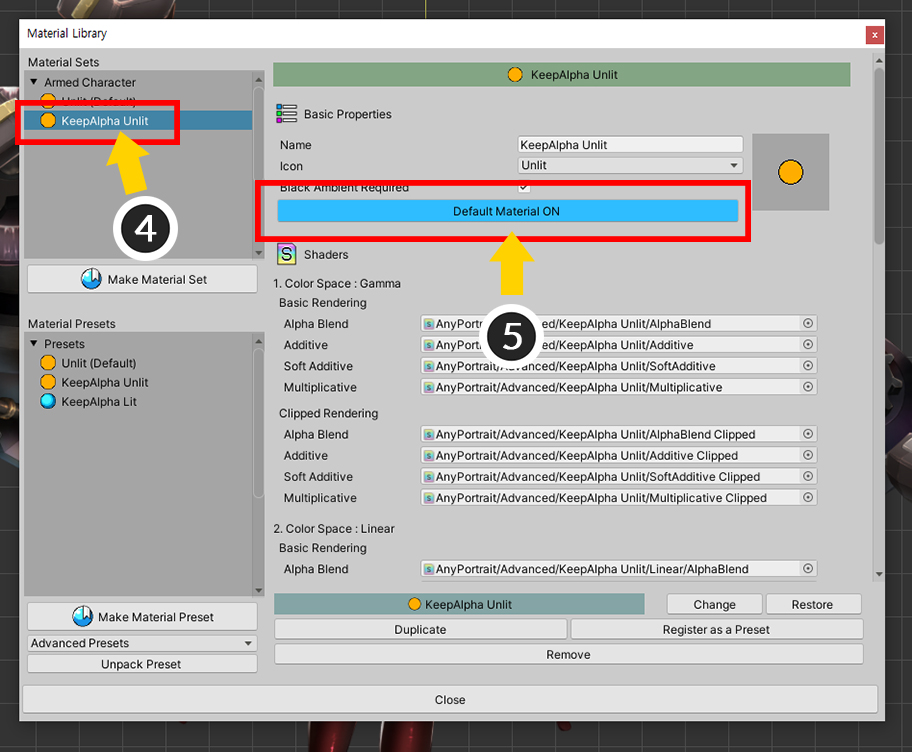
(4) You can see that a new "KeepAlpha material set" has been added. Select the created KeepAlpha material set.
(5) Click the "Default Material" button to set the default material.

Execute Bake.

(1) When you return to the Unity scene, you can see the character with the material applied. (The KeepAlpha material generally shows almost the same results as the default material, especially if KeepAlpha Unlit is selected, it will look almost the same.)
(2) Click the "Start Recording" button to start recording.
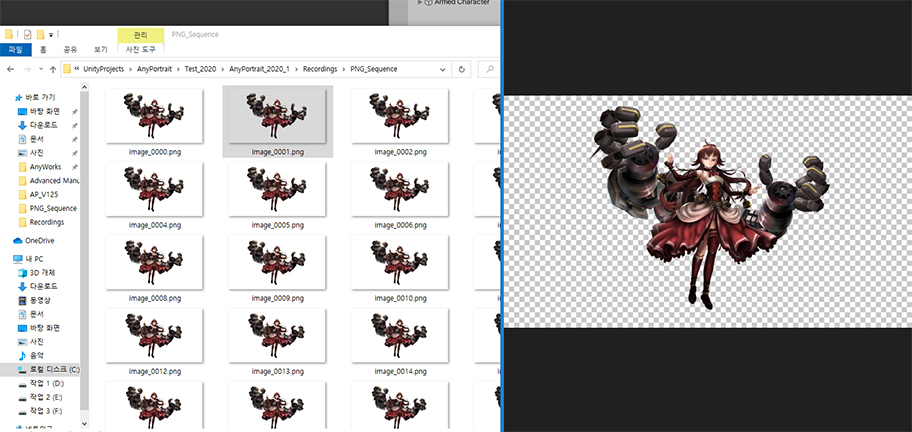
End recording and open the saved image files.
Now you can see the character rendered on a transparent background.