AnyPortrait > Getting Started > 2.9. Creating Bone Animation
2.9. Creating Bone Animation
1.0.0
On this page, let's create a simple animation.
Learn the entire process while creating a repeating animation in which the character bounces lightly.
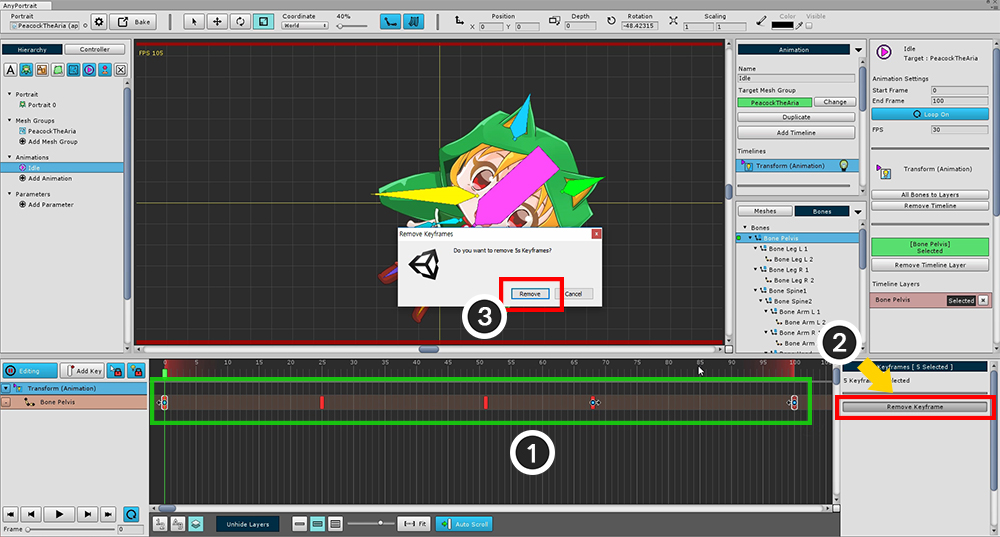
Creates a new animation clip or deletes animation keyframes that were created before.
If you delete keyframes,
(1) Select all keyframes (2) Press the Remove Keyframes button to remove.
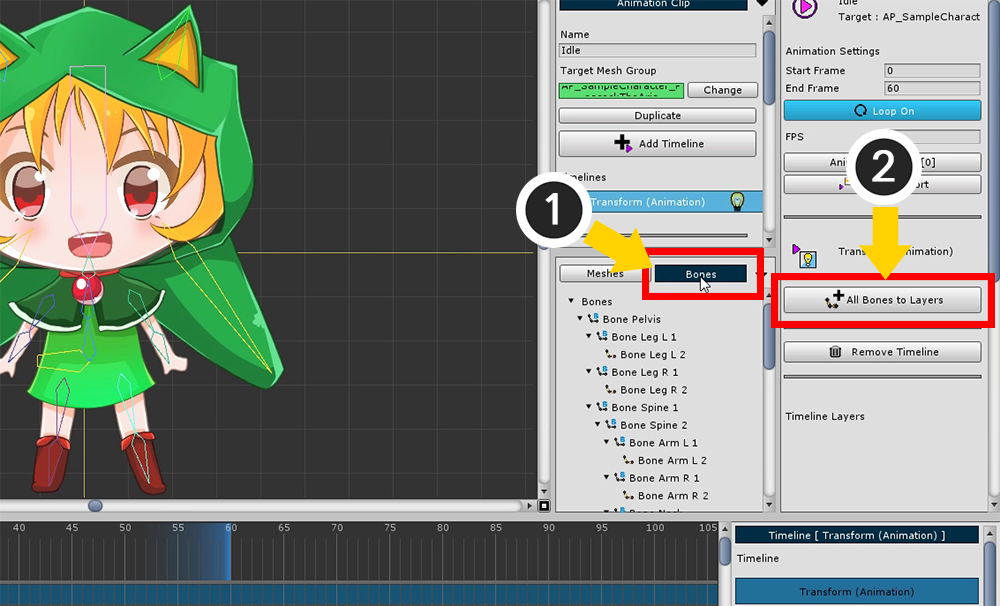
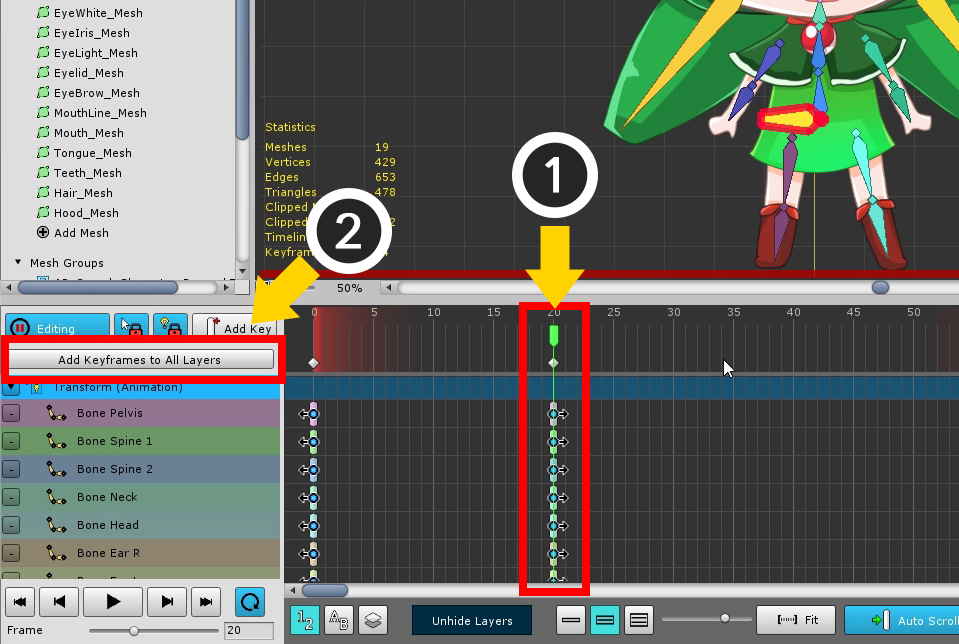
Selecting all the bones and adding them to the timeline is cumbersome and time-consuming.
(1) With the Bones tab selected
(2) Press the All Bones to Layers button to create a timeline layer for all bones at once.
Skips work for already added bones.
(With the Meshes tab selected, add all meshes as timeline layers.)
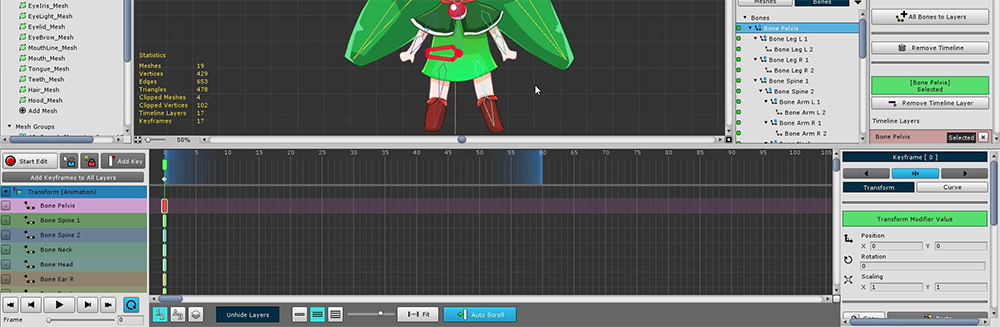
All bones are registered on the timeline.
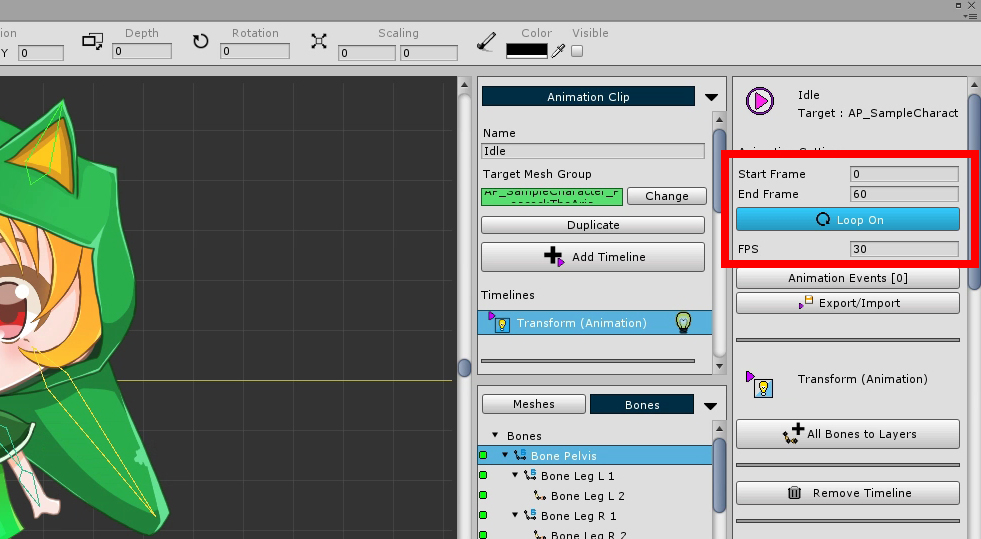
Turn on Loop of animation to create loop animation.
You need to create a second frame, which can be cumbersome if you have multiple timeline layers.
In this case, it is convenient to use Add Keyframes to All Layers function.
(1) Move the time slider, and (2) press the Add Keyframes to All Layers button to create keyframes in batches.
(Note: Edit mode must be activated to create keyframes.)
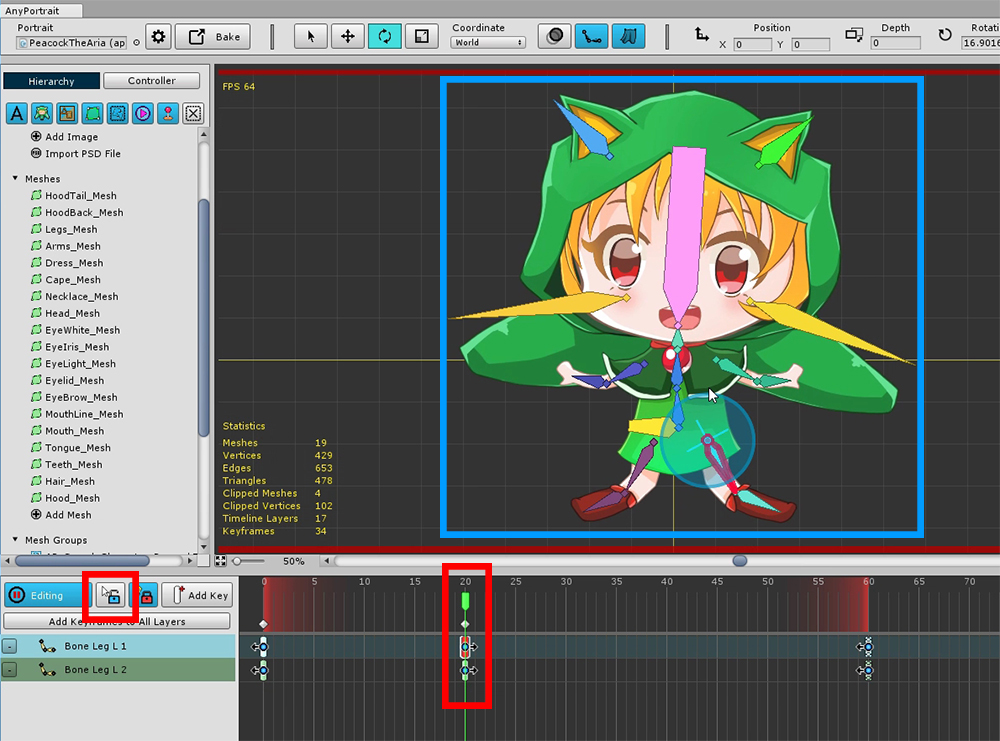
Move the time slider to where the generated keyframe is located and turn on edit mode.
In this state, it will hold a pose that makes the character jump.
It may be convenient to turn off the Selection Lock and work on it. ( S )
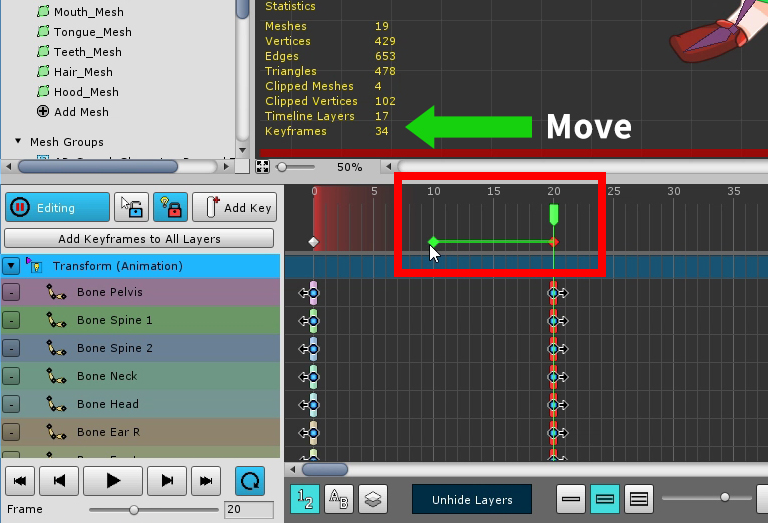
When moving keyframes, it can be cumbersome if there are many timeline layers.
Selecting a Common Keyframe located below the time slider allows you to select and control all the keyframes at that location at once.
Create animations by moving or copying keyframes.
Let's make a few more repetitions of pose 1 and 2.
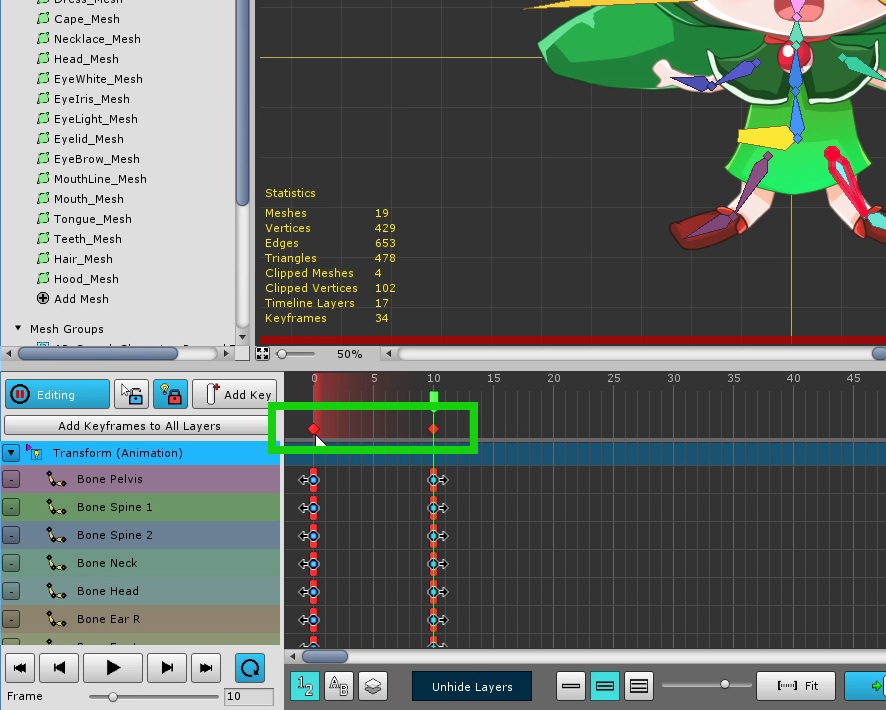
Select all keyframes.
You can select a common keyframe by dragging the mouse.
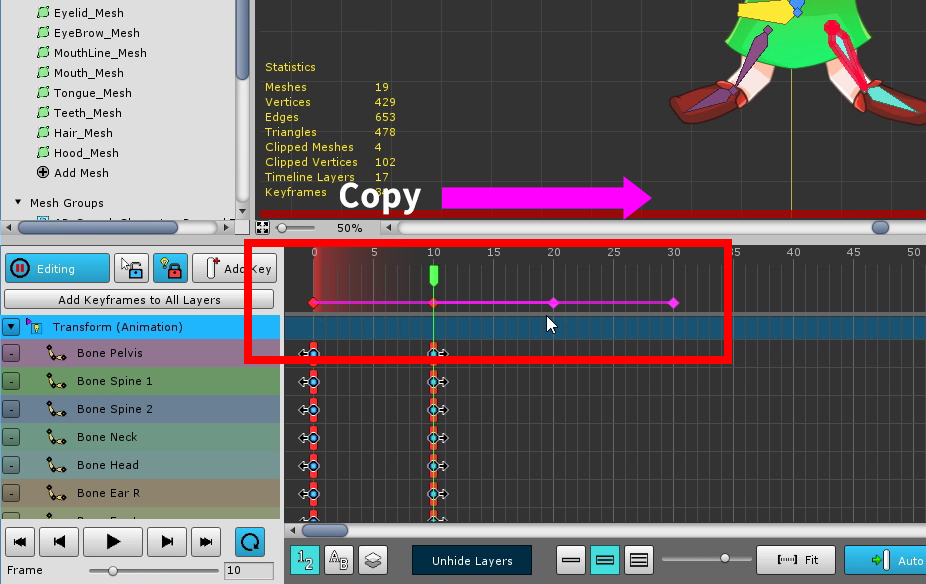
Copy keyframes in this step. (Hold down the Shift or Ctrl ( Command ) and Drag Mouse )
The pattern of the animation repeating pose 1, 2 is copied.
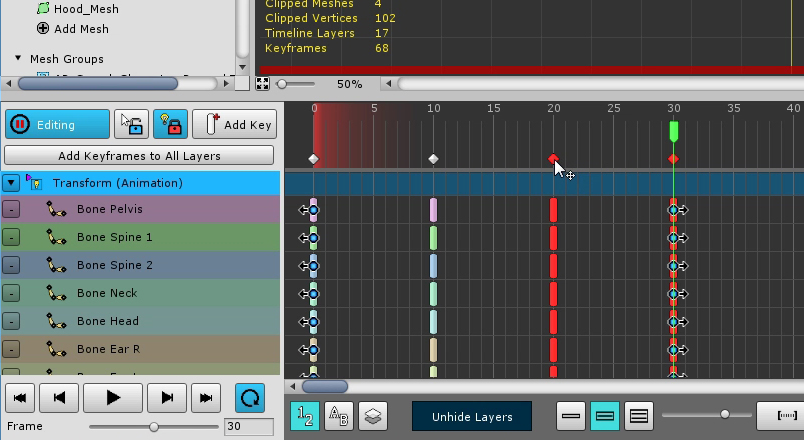
This sample will no longer be modified, but you can create an animated pattern and then make some variations to create interesting results.
Copy the pattern one more time to complete the animation.
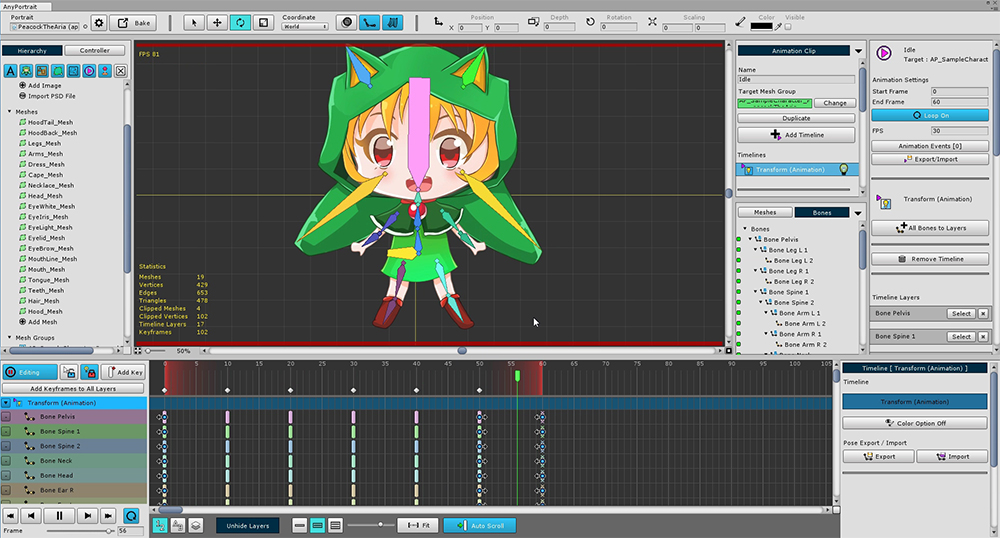
Now we move the finished animation to the scene.
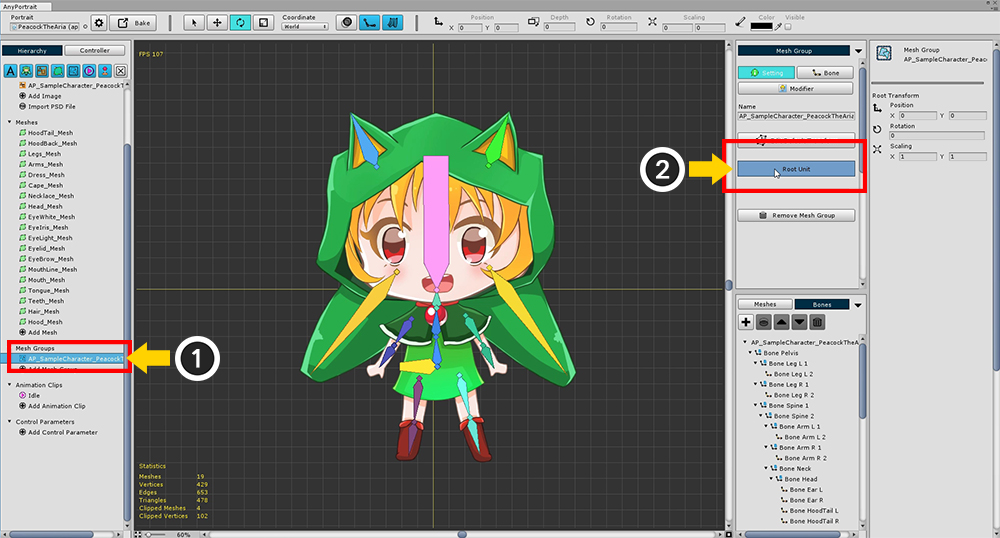
(1) Select mesh group again, and (2) Confirm that it is registered as Root Unit.
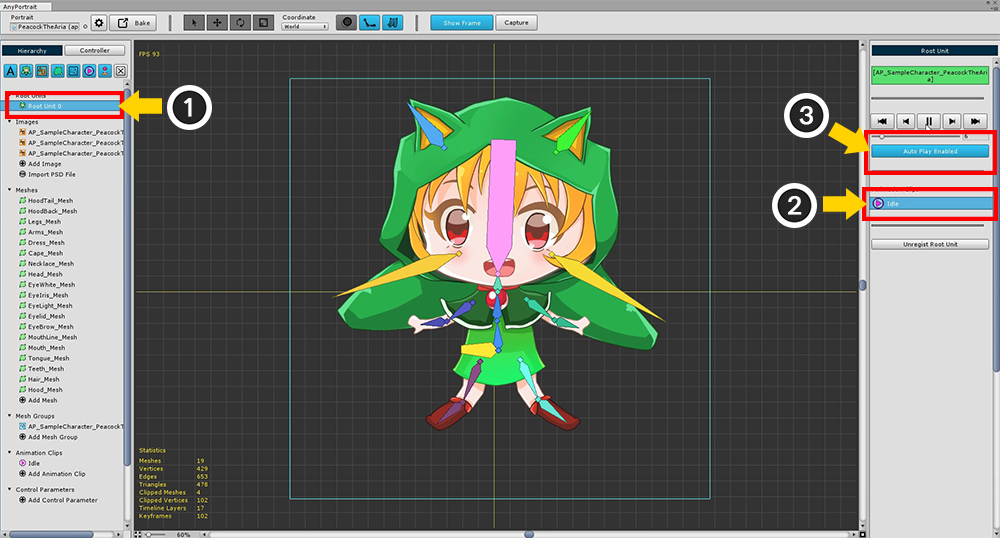
If you (1) select Root Unit 0 in the Hierarchy menu, the completed animation is automatically registered.
You can test by (2) selecting animation and executing it.
(3) Press the Auto Play button to set the animation to play automatically in the scene.
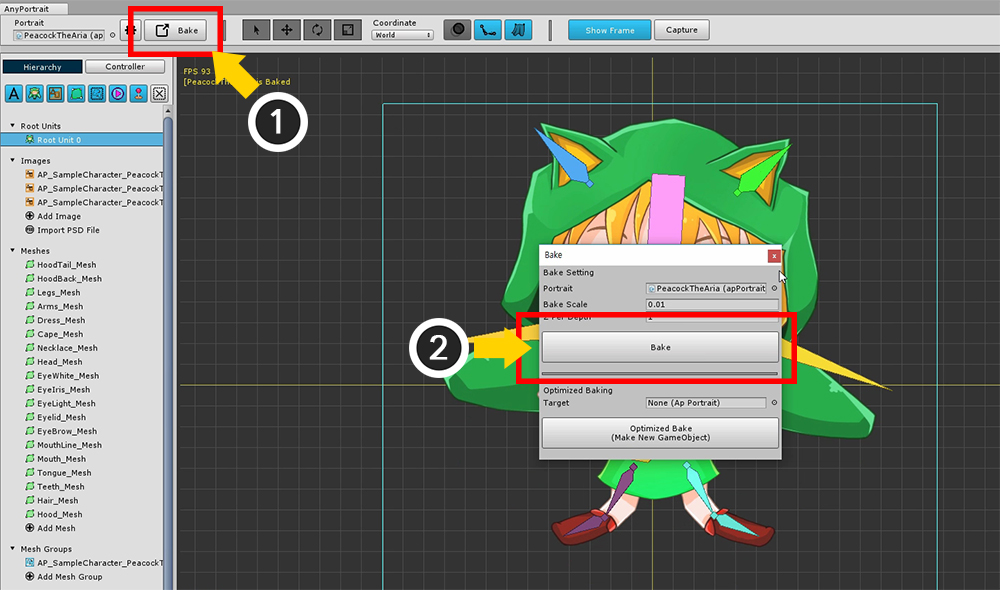
Bake to move the character you created so far to the scene.
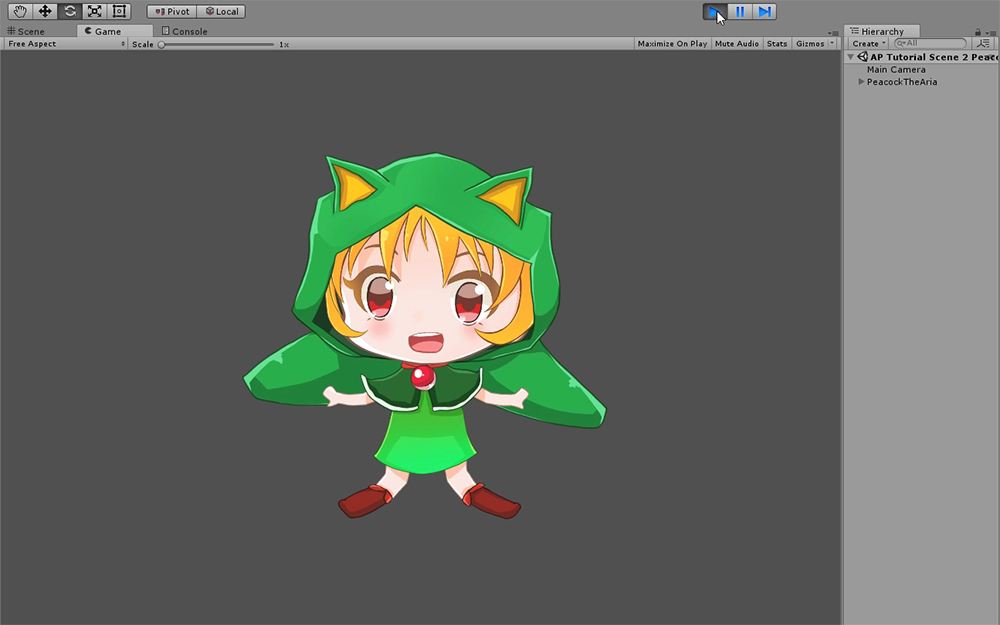
When you run the game in the scene, you can see that the animation is running automatically.