AnyPortrait > Getting Started > 1.1. Starting AnyPortrait and creating apPortrait
1.1. Starting AnyPortrait and creating apPortrait
1.0.0
Download AnyPortrait from Unity AssetStore and install it.
Available in Unity 5.5 or later.
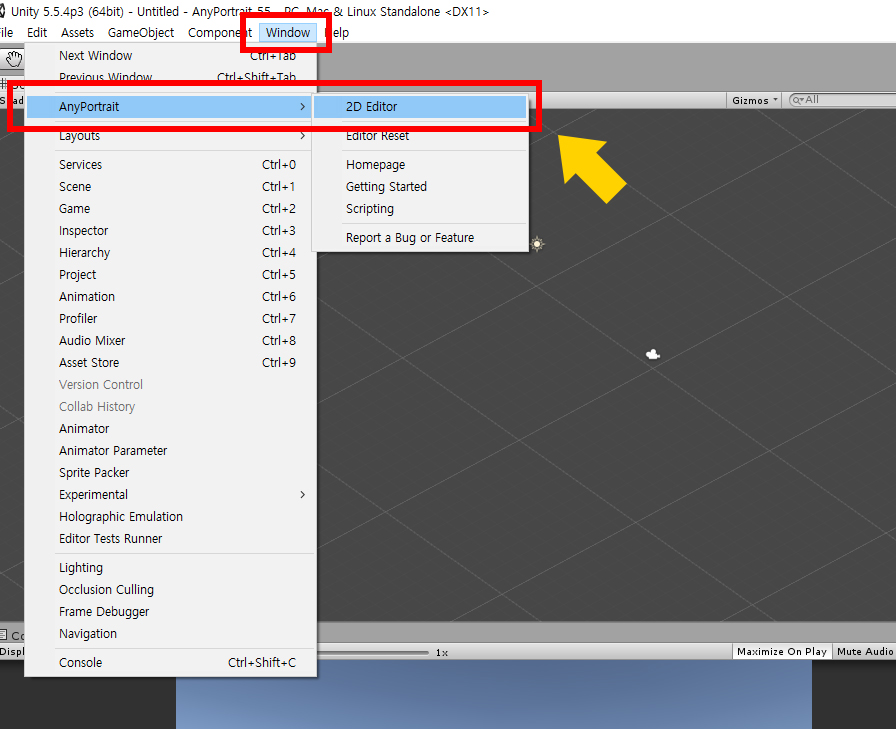
If you installed the package, you can see Window > AnyPortrait in the top menu.
Window> AnyPortrait > 2D Editor to launch the editor.
From AnyPortrait v1.5.0, the menu name is changed to Window > AnyPortrait > Open Editor.
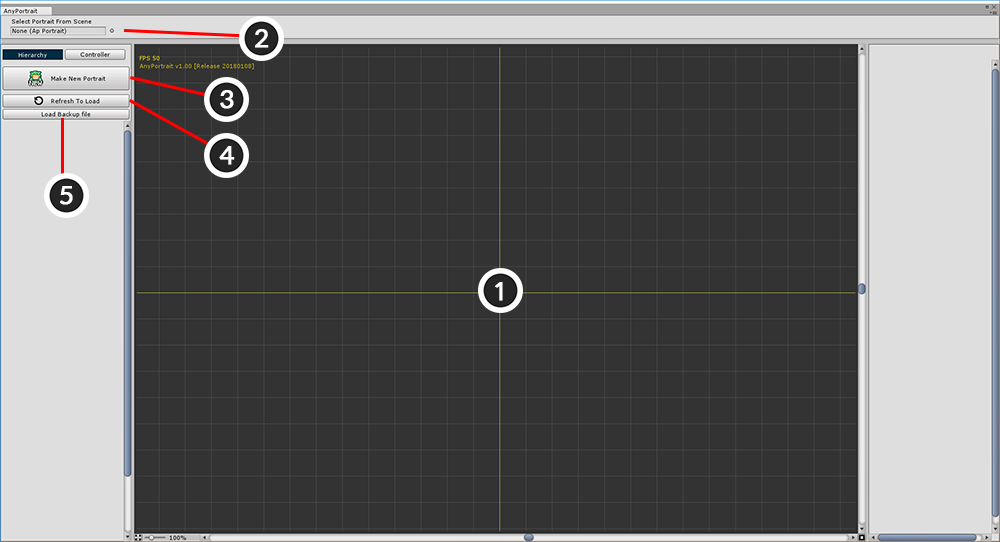
It is the first screen where AnyPortrait is executed.
1. Workspace : This is where the main tasks are processed in the editor. You can move and zoom the focus by Scrolling the Mouse Wheel or Clicking the Wheel Button.
2. apPortrait Object : The apPortrait object currently edited. Here you can replace and select apPortrait.
3. Make New Portrait : Create apPortrait.
4. Refresh to Load : Refresh the list of apPortrait present in the scene. After refreshing, the objects that can be opened at the bottom of the button appear.
5. Load Backup File : Open a backup file and create a new apPortrait.
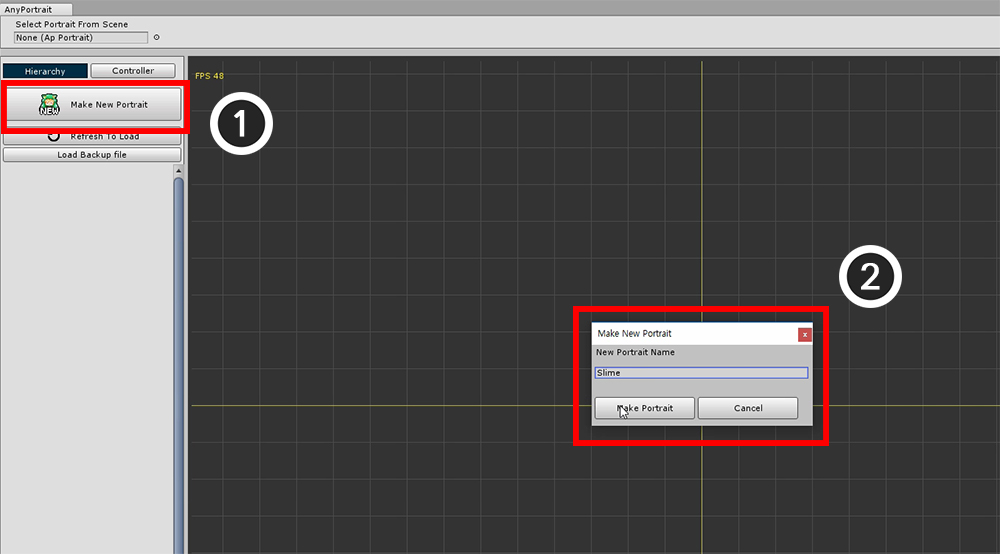
Press the "Make New Portrait" button to create a new apPortrait object.
Enter a name in the dialog box.
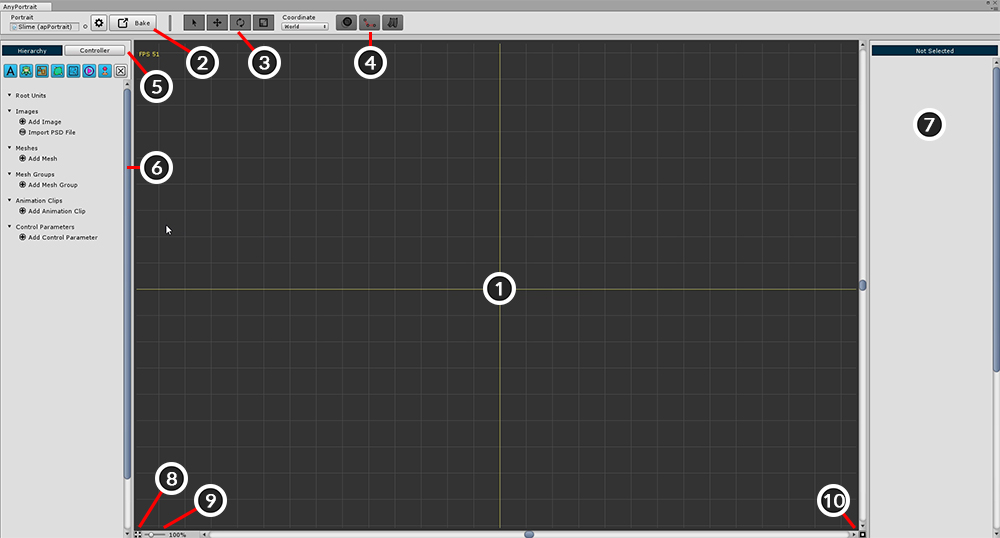

When you create apPortrait, the UI at the top and left of the screen changes. Each function is as follows.
1. Workspace : This is where major work takes place. You can Zoom ( Scroll the mouse wheel ) and Move ( Drag the Mouse Wheel Button ).
2. Setting, Bake button : Opens a dialog for changing apPortrait and editor settings, or for exporting.
3. Select, Move, Rotate, and Scale tools : These tools are used to modify shapes. The shortcut keys are Q, W, E, and R .
4. Onion Skin, Bone, and Physics Show / Hide buttons : Determines whether the Onion Skin, Bones, and Physical Effects are displayed on the screen. The Onion Skin's shortcut is O , and Bone's shortcut is B
5. Hierarchy, Controller tab : Tabs on the left UI. Press "Hierarchy" to see the objects you are working on. Press "Controller" to see the registered Control Parameters.
6. Hierarchy : This is the UI that appears when "Hierarchy" is selected. Objects are shown by type, and the filter button at the top allows you to see only certain types of objects.
7. Details UI : Right UI is the area where information of selected object is output. Depending on the selected object, it may be divided into up to 3 zones.
8. Maximize workspace : Hide the top and left and right UIs and greatly increases the workspace. The shortcut is Alt+W .
9. Zoom : Specify the zoom of the screen. You can also control using the Mouse Wheel .
10. GUI Reset : Reset screen scrolling and zooming.

When you press the Setting button, the above dialog box appears.
Here you can rename apPortrait or change the language and color of the editor.
1. Portrait tab : Settings of apPortrait currently being edited.
- Name : Edit the name of the selected apPortrait.
- Important / FPS : If "Important" is on, it will be updated every frame. (FPS is ignored.) Conversely, if "Important" is off, it will be updated to the specified "FPS" for better performance. It is recommended to turn off Important if the object is not important in the game.
2. Editor tab : Settings of the editor.
- Language : Languages of the editor are supported. Supports English, Korean, French, German, Spanish, Danish, Japanese, and Chinese (Traditional / Simplified) based on the release version.
- Show FPS / Statistics : Display the editor's FPS and current Workspace data.
- Auto Backup Setting : Setting of automatic backup. You can specify the save time and path.
- Pose Snapshot Setting : When editing the animation, you can save the posture of the bone. It is the path of the save file.
- Editor Colors : Setting of GUI colors of the editor. You can return to each default value by pressing the Default button.
3. About tab : Licenses for AnyPortrait and the external libraries used in the editor are specified.
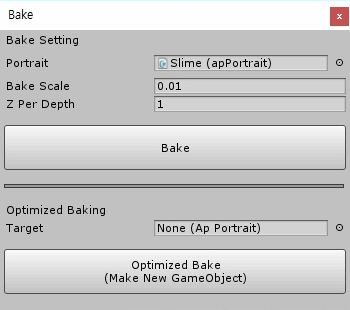
When you press the Bake button, the above dialog box appears.
This function is used to export the results from the AnyPortrait editor to the scene.
1. Portrait : This is the apPortrait to be baked.
2. Bake Scale : The ratio of the size applied to the scene. Because the scene and AnyPortrait's coordinate system are different, you have to scale them appropriately.
3. Z Per Depth : Set Z distance of each meshes. (A value that is too low can cause a Depth Fighting problem.)
4. Bake button : Export to scene and apply.
5. Optimized Baking Target : This is the target of optimized Bake.
6. Optimized Bake : Bake only the execution data and copy and export optimized objects. Creates a new target if it does not exist.