AnyPortrait > Getting Started > 2.1. Import the PSD file
2.1. Import the PSD file
1.0.0
Most of the illustrations exist as files with layer information.
AnyPortrait provides the ability to create mesh groups at once using layer information.
With the images included in the tutorial package, Let's open the PSD file and start working on it.
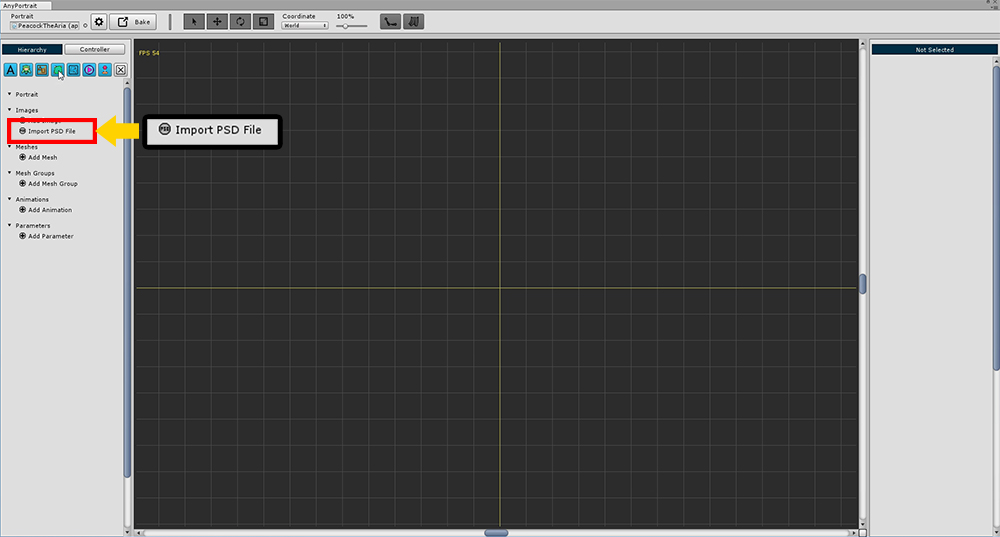
Create a new apPortrait and press the Import PSD File button.

Press the Load PSD File button on the first page.
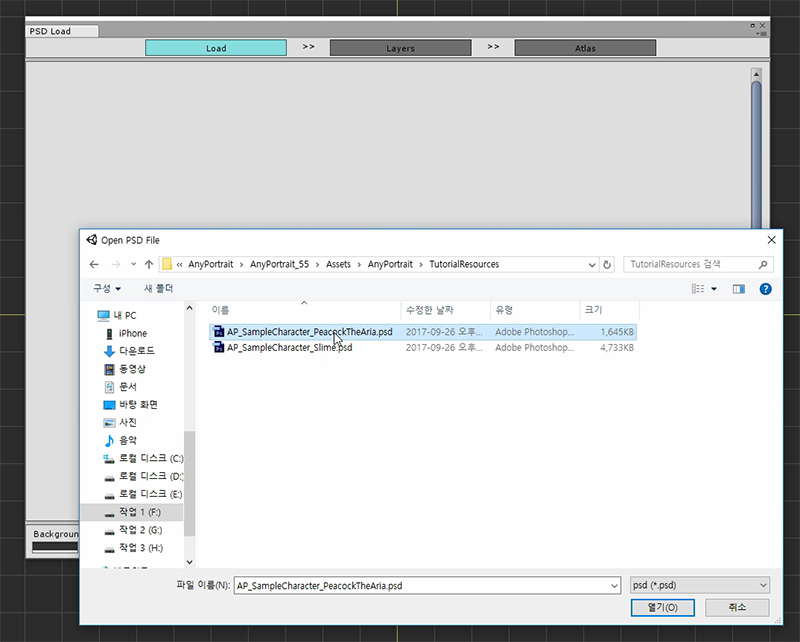
Select and open the AP_SampleCharacter_PeacockTheArea.psd file provided by the package.
(The PSD file path does not have to be in the Assets folder.)
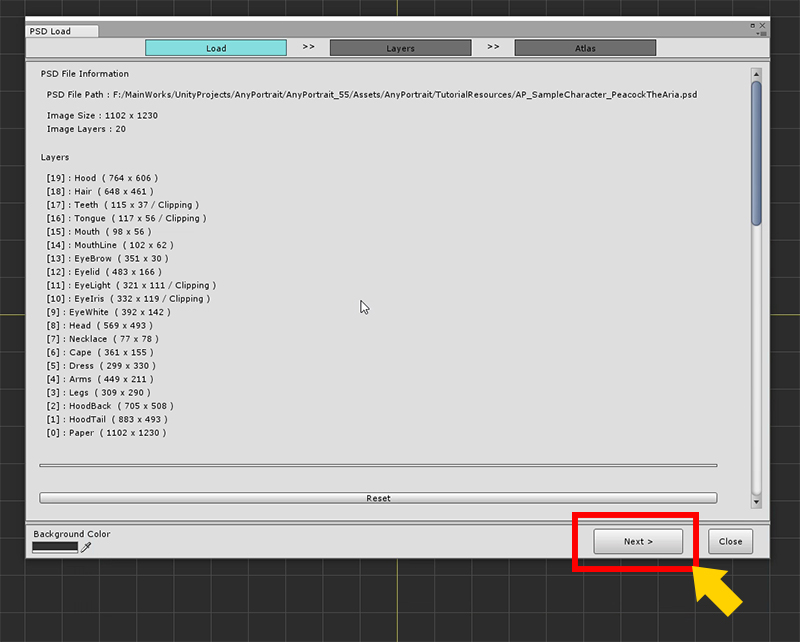
Make sure the file is open normally and click the Next button.
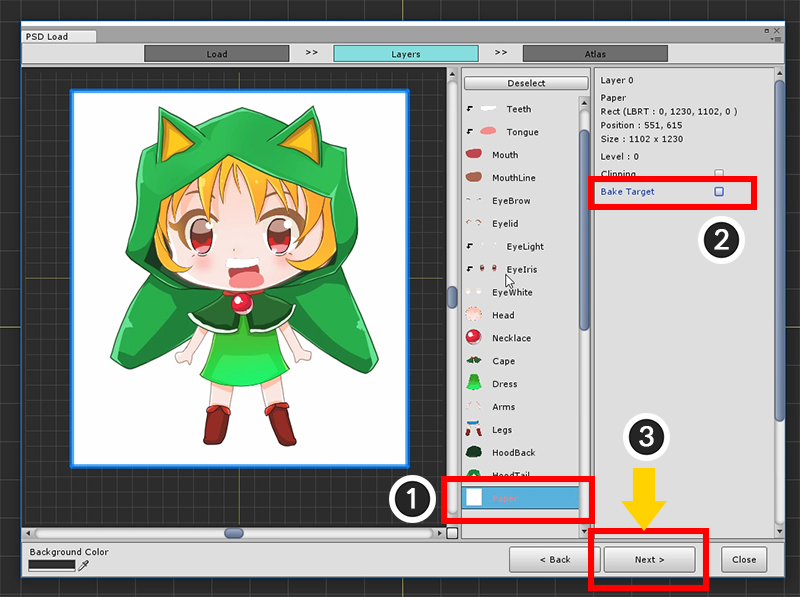
Go to the second page, "Layers" page, and the loaded layer images will appear.
You should exclude layers that are not needed here.
(1) Select the Paper layer, and (2) Release Bake Target.
When all settings are completed (3) Press the Next button to proceed to the next page.
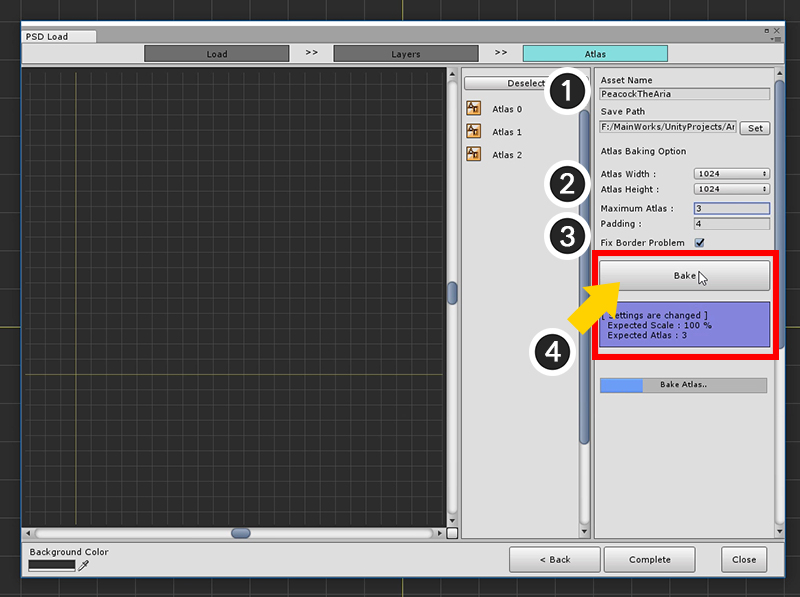
Now it is the process of making PSD files into several images and making them into assets. We call it Bake here.
(1) Specify the name of the image file and set the path to save as an asset. (Set the path to the Set button.)
(2) Set the size of the image Atlas. 1024 or 2048 is recommended.
(3) Determine the maximum number of Atlas to be bake. If you specify a small number, the whole will be shrunk to become Bake.
Set Padding and set Fix Border Problem. (Checking the Fix Border Problem solves the problem with translucent colors that appear at the edges.)
(4) Press the Bake button to create Atlas.
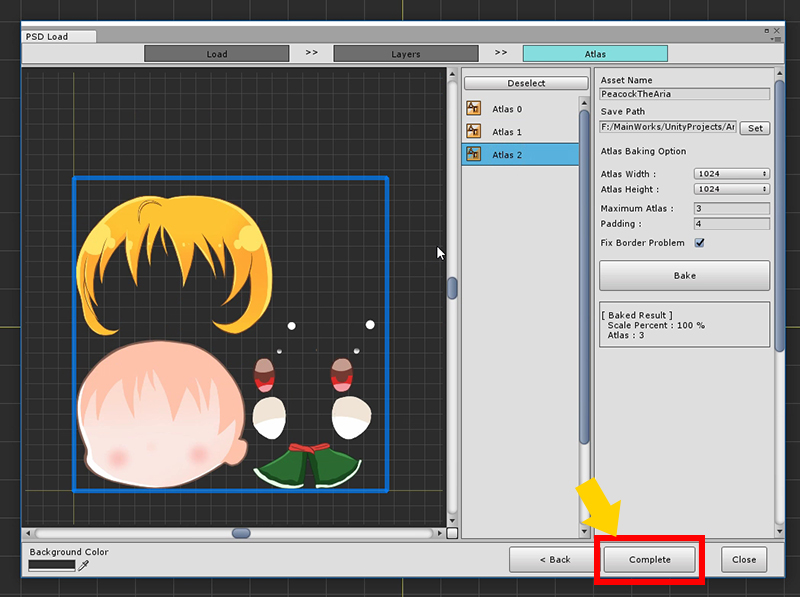
When the Atlas is created, press the Complete button.
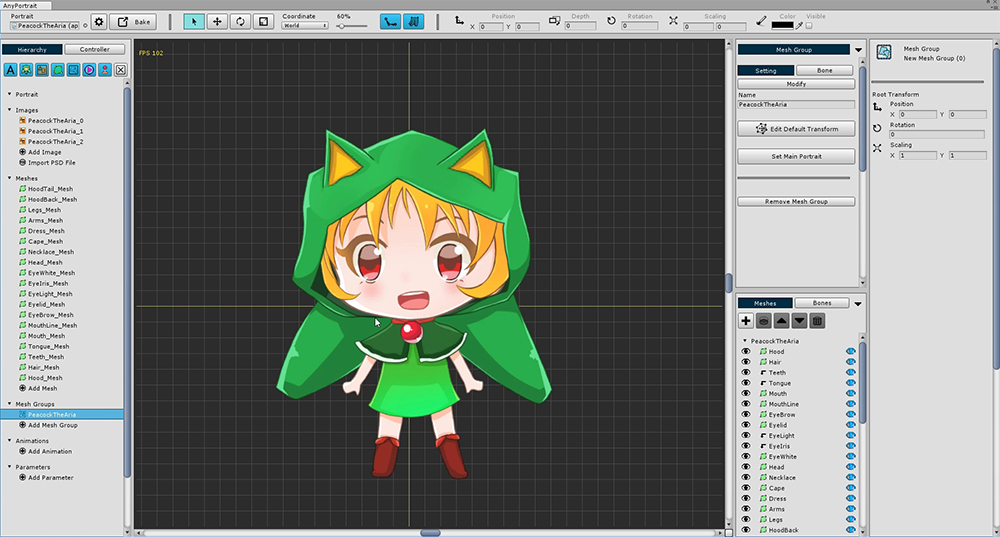
You can see that Images, Meshes and Mesh Groups are all created automatically.
Atlas image quality imported from PSD is not good!?
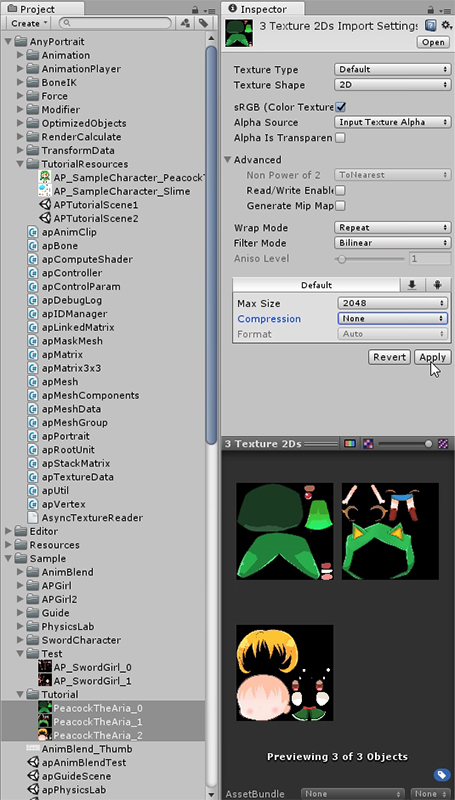
Atlas created from a PSD file are stored as assets.
Depending on the Texture Import settings, this can be overly compressed or unintentional mipmap creation, since this is the default.
Character illustrations may require processing for quality, such as not compressing or setting mipmaps.
Immediately after loading the PSD file, check the image asset settings.
Learn more on the Related Page.